Thursday, March 17, 2011

You are a DEAR FRIEND

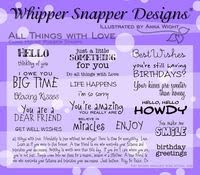
I want to show you another of the newly released WHIPPER SNAPPER DESIGNS cling sets that I've used for today's card. The set is called Fox Friends and it contains the most adorable fox, birds, snail, sentiments, party hat and beautiful forest tree line for you to create thinking of you, birthday and scenic cards as well.
Fox Friends <---- Click the words "fox friends" to take you directly to the site. 
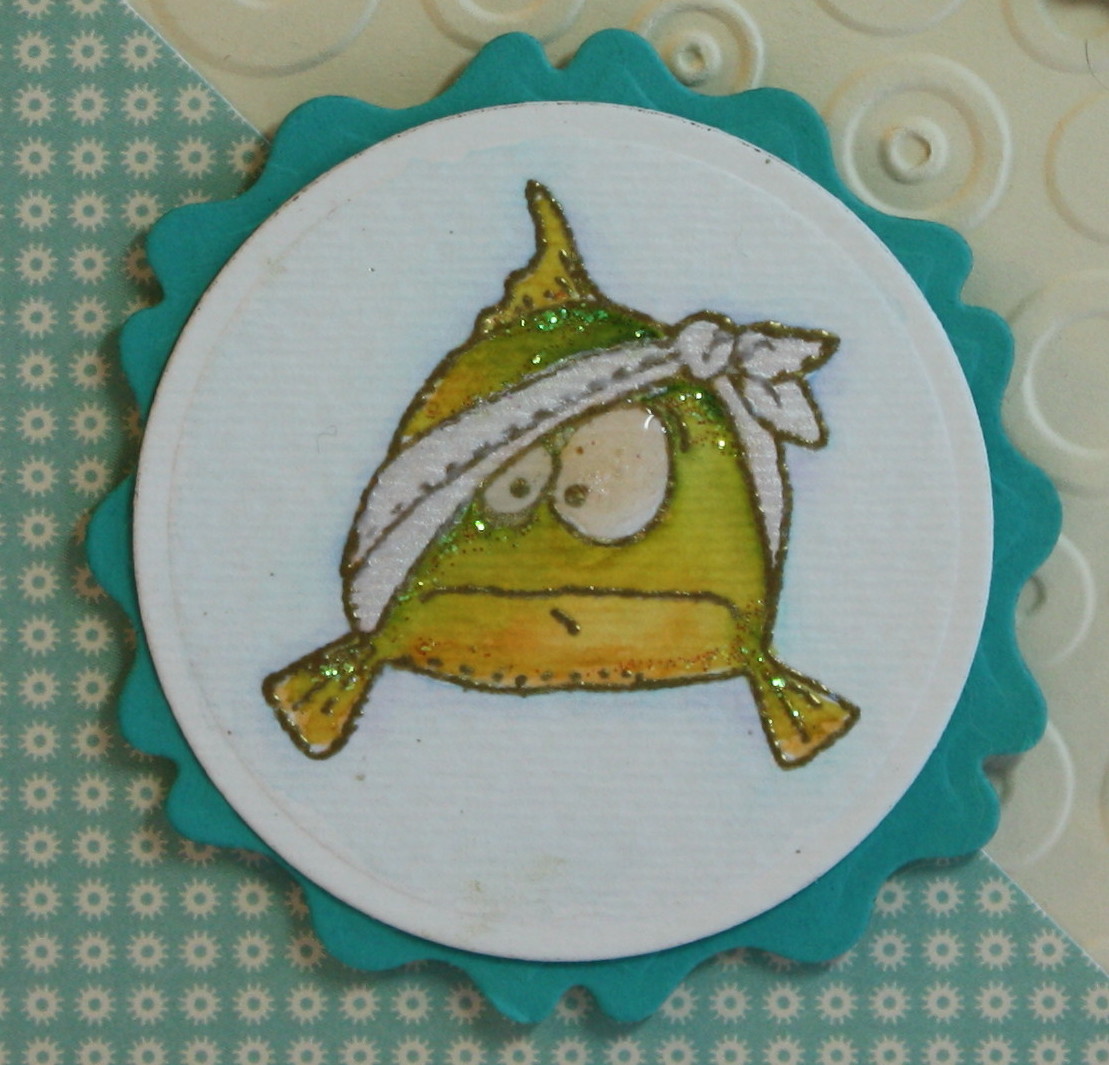
For this card I used some beautiful designer paper from Stampin' Up! and carried the browns, pink, yellow and blue color scheme out in the flowers and paper. I used watercolor paper and stamped the images with Versamark and embossed the images and sentiment with antique gold ultra fine embossing powder. Then I water colored the images with Tombow Markers and a wet brush.

Of course the sweet fox friend needed some extra embellishment so I added Ivory Flower Soft product to her tail and chest fur and some pink liquid pearls to the sweet bow on her head and then popped her up, as well as the birds, with pop dot foam squares.

The sentiment, "You are a DEAR FRIEND" is from the newly released sentiment cling mount set titled "All things with Love" shown below:

All Things With Love <---- Click here to take you directly to the sentiment cling mount stamp set.

This Fox Friends cling set is filled with stamps to create a wide variety of cards. I know it is one that will be a 'go to' set for me in creating a variety of greeting cards.

Until next time,
Cheers!

Jennifer

Monday, March 14, 2011

Feelin' Fishy

BIG NEWS!! Do you love Whipper Snapper Designs? If you do, then you'll want to go to Whipper Snapper Designs website and check out the four latest stamp set releases. Anna Wight's whimisical designs are fresh and fun and I know you'll love them.

I was absolutely ecstactic to receive an invitation from Anna Wight to be one of the Guest Designers for the latest releases. So without further chatter, I want to show you a couple of the newly released sets with cards I've made using them.

The first set I used is called "Feelin' Fishy" and I am having so much fun with this set. Anna created the cutest and funniest fishies and sentiments to go with it.


Now I ask you...don't you think someone who might be feeling a bit under the weather feel better to receive a fun card like this? This is just one of the 8 different fish illustrated in the set.


And just to let you see all of the great stamps in the set, here is the CD case filled with these whimsical stamps and sentiments.

Feelin' Fishy <---- Just click to take you directly to Whipper Snapper Feelin' Fishy.

The next card I want to show you also uses Feelin' Fishy and I've also used one of the sentiment stamps from the "All Things with Love" set. This one is "You make me Smile" and it can be used for so many of Whipper Snappers designs. I thought it was fun with this fish wearing goggles.


Check out all of the fun sentiments in the "All Things with Love" set.


All Things With Love

I'll have more cards and sets to preview for you over the coming weeks. Be sure to check out Whipper Snapper Featured Designer Gallery for more inspiration and card designs using Anna Wight's Whipper Snapper Stamps.

Until next time,

Cheers!

Jennifer

Welcome to Spring

I had a happy surprise when I was asked to be one of the Guest Design Team members for March at the HOUSE MOUSE AND FRIENDS challenge blog. Of course I was happy to accept the invitation!

"Welcome to Spring" is this week's House Mouse and Friends card challenge and what says spring more than baby chicks and budding flowers?

This little House Mouse is happily feeding the fuzzy chicks seeds. If you look closely you'll see the seeds are actually seed beads. I used Flower Soft product to create the look of the fuzzy chick down fleathers. The designer paper is from Stampin' Up! and I just love the yellow, blue and pink combination. It fits so well with the welcome to spring theme, don't you think?

I colored the image with Copic Markers. Then added the Flower Soft, sead beads and a little gold leafing to the edges after cutting the image with a Nestibilities die. I used a Martha Stewart punch for the lattice border edge, added some flowers and the card is ready for mailing.

Be sure to hope on over to House Mouse and Friends Monday Challenge blog to see the design team's Welcome to Spring cards. While you are at it, why not join in the challenge. We'd all love to see your creations.

Cheers!

Jennifer

Saturday, March 12, 2011

Easter Blessings

It is hard for me to imagine, due to all of the snow we've had this past week, that many of my friends and family are seeing daffodils and crocus peeking through the ground. I won't be seeing spring flowers for a while, but that just inspires me more to make cards with spring flowers.
This week's Friday Sketchers Challenge #145 (sketch shown below) provided the impetus for this Easter Blessings card. Such a lovely layout sketch!

I used the Stampin' Up! set titled "Abundant Hope" for this card. I colored the image with copic markers and used just a touch of stickles for some dew-y sparkled on the petals. The designer paper is from Ocotber Afternoon "Thrift Shop". I added some white pearls to the Prima Flowers and sweet little yellow pearls to the satin ribbon on the band.

I'm going to begin making some more Easter cards. Do you send Easter cards?

Until next time,
Cheers!

Jennifer

Friday, March 4, 2011

House Mouse Birthday Swing Card

It's been literally years since I've made a swing card and what could be more fun than to make a swing card (or sometimes they're called Flip-flop cards) using this adorable House Mouse birthday stamp. The swing card worked in perfectly for this week's Challenge #90 Multi fold card at House Mouse and Friends Monday challenge blog. This card most definitely has a lot of folds!

When I turn my card to the back side, this is what you'll see. The sentiment I used, The more candles the bigger the wish!, is from a Stampin' Up! set and I masked candles around the sentiment using the candles from a House Mouse stamp.

If you are interested in how to make a swing (or flip-flop) card, there is a wonderful tutorial on Splitcoast stampers that details the dimensions and scoring, folding and cutting lines. You can find that tutorial HERE. I made mine with different dimensions but the card is constructed in the same manner as the tutorial.

Now, hop on over to House Mouse and Friends Monday challenge blog to see more wonderful challenge cards using multiple folds.

Thanks for dropping by!
Cheers!

Jennifer

Tuesday, February 15, 2011

Sympathy for loss of your cat

Everyone who knows me knows my love for animals. As one who has owned and loved and said goodbye to many beloved pets, I know the heartache one feels when they lose a furry friend. As a cardmaker, I try very hard to reach out to those who have lost a pet with a sympathy card. I don't like the fact of making them, but I do know how much I've appreciated the acknowledgement of loss in my own life, and so I try to pass the expression of sympathy on to others when they lose a pet.

Today's card is for the loss of a kitty. I really liked this week's Mojo Monday Layout challenge that Julee provided and used it for this sympathy card. Below is Julee's layout challenge #178:

The sentiment is a lovely pet sympathy set from Papertrey Ink. The cat stamp is from Stampin' Up! "C is for Cat" set and I stamped it with Versafine Sepia ink and embossed with clear embossing powder. The lovely background paper is from K & Company. I'm not sure who makes the pawprint ribbon.

Thanks for stopping by today.

Cheers!

Jennifer

Monday, February 14, 2011

An Apple a Day


It's time for a new House Mouse and Friends Monday challenge and this week's challenge was a difficult for me. Difficult because the challenge was to use your favorite House Mouse, Gruffies or Happy Hopper stamp. How does one choose a favorite? I put on my stamping table quite a few stamps that I'd call my favorite, but I finally settled on using this Happy Hopper titled, An Apple a Day.

Card Recipe:
Stamp: Happy Hopper "An Apple a Day" by Stampabilities
Ink: Momento Tuxedo Black, Tim Holtz Distress Ink in Antique Linen and Peeled Paint
Image Colored with Copic Markers
Designer Paper: Stampin' Up! (apple paper)
Accessories: Stampin' Up! scalloped border punch and ticket punch, brass brads, Stampin' Up Button, Miscellaneous ribbon from my stash, clear dimensional glaze

Thanks for stopping by.
Cheers!
Jennifer

Tuesday, February 8, 2011

A little birdie told me....

Several months ago I bought this adorable Sugar Nellie stamp and knew I'd just love using it. Well, as sometimes happens, good intentions get put on hold and I never inked this sweetie-pie stamp until today. I've been finding a lot of inspiration lately from challenge blogs and this week's FRIDAY SKETCHERS challenge blog provided the layout that inspired today's card. Here is the sketch layout, below:

Card Recipe:
Stamps: Sugar Nellie
Papers: Making Memories English Garden and October Afternoon Thrift Shop
Cardstock: Stampin' Up!
Ink: Momento Tuxedo Black and Momento Rose Bud
Image colored with Copic Markers
Embellishments: Stickles, Liquid Pearls, Prima Flowers, Nestibilities large circle and scalloped circle dies, Cuttlebug corner die and Sheer Creations pink ribbon.

I have the perfect someone to send this card to because "...a little birdie told me..." something that I can't tell yet.

Hope on over to FRIDAY SKETCHERS to check out the design teams cards as well as the hundreds of participants world wide. It's such a fun site.

Until later,

Cheers!

Jennifer

Monday, February 7, 2011

Hello, Sunshine!

As I sit at my craft table looking out the window, I see a cold day, snowing, no sign of spring in sight. I MISS MY GARDEN!

OK, now that I've got that tantrom out of my system, I decided to make a card with these fun floral garden overalls. I wish I had a pair just like these to work in my garden. But to help me dream through these winter doldrums, Julee provided us with a MOJO Monday Sketch challenge #177 that worked perfectly for my dreams of gardening and warm sunshine. Below is this week's sketch challenge:

Card Recipe:
Stamps: Rose Gardeing Bibs from Impression Obsession, Inc and the sentiment is from Papertrey Ink
Ink: Momento Tuxedo Black, Momento Bamboo Leaves, Tim Hotz Antique Linen
Paper: October Afternoon Thrift Shop
Cardstock: Stampin' Up!
Embellishments: Daisy Doodle flowers, Martha Stewart Leaf punch, Stickles, Coats and Clark Buttonhole twist thread, Button Brad, miscellaneous brass trowel charm.

How about you? Are you counting the days until spring and getting out in the garden?

Until next time,

Cheers!

Jennifer

Love is in the air


This week's challenge at Penny Black Saturday Challenge blog is to finish complete a sentiment beginning with "Love is..." using a Penny Black stamp. I just had to play along with this darling Penny Black stamp titled, Furry Embrace.

I colored the image with Prisma Color Pencils (I do not use a blending medium). The gorgeous ribbon was the inspiration for the color theme for the card. The ribbon spool states the maker is Celebrate It and I found it in the sale bin at Michaels. I just love it and the branches and flowers seemed to complement the branch and flowers holding the rope swing.

The sentiment, "Love is in the air" is computer generated and I felt expressed the emotion of these two kitties on the swing.

I used a Martha Stewart border punch for the hearts beneath the image and a Stampin' Up! oval punch to punch out the sentiment. The leaves are also a Martha Stewart punch. The flowers are from Recollections. Then I added touches of Cottoncandy Stickles on the flowers and kittens.
I don't send a lot of Valentines but I do have some special people that I like to share a Valentine note with and I know exactly who this sweet "Love is in the Air" will be sent to.

Cheers!
Jennifer

Saturday, February 5, 2011

You make my engine roar!

This week's challenge over at the House Mouse and Friends Monday Challenge blog is to use HEARTS on your House Mouse, Gruffies or Happy Hopper card. This adorable Gruffies stamp, titled Hanging on for Dear Life, features the Gruffies bears Booda and Biggly. The challenge worked perfectly for me to make a Valentine for my mister. This is how I feel when riding behind the mister on his motorcycle, i.e. "hanging on for dear life." (tee hee hee)

I used one of my new paper piercing stencils/embossing dies from Spellbinders which has the lovely paper pierced swirls and the embossed heart in the center. The pierced swirls seemed appropriate to represent the motorcycle exhaust.

I love making motorcycle themed cards for the mister but try to add my personal touch of femininity with ribbons, glitz and glitter.

The image is colored with copic markers and I used a variety of gem stones that were in my stash from years ago (manufacturer unknown). The red heart in the center of the white grosgrain bow is actually a little plastic button. I cut the shank of and adhered it to the ribbon.

Woo hoo...I have the mister's card all ready a week early! Check out other House Mouse and Friends cards over at House Mouse and Friends Monday challenge.

Cheers!
Jennifer

Thursday, February 3, 2011

Homemade Valentine Marshmallows

With the winter blizzards hitting all over North America, I would guess that there has been a surge on marshmallow purchases for hot chocolate after a day of shoveling, sledding and skating. It made me curious to know how if I could make my own homemade marshmallows.


Ahhhhh...the joy of the internet. I did a search and sure enough, there are a number of recipes for making your own marshmallows at home. And the good news is, they are very easy to make, take only a few ingredients and they are VERY YUMMY and fresh and just the way a good marshmallow should taste! Here is the mister sampling a mug of hot chocolate with one of my heart shaped, cinnamon and spice flavored marshmallow in it! He said, "yummmmm" and raised his head with marshmallow stuck to his mustache.
I adapted a Martha Stewart recipe with a few tweeks of my own. First, I decided that I didn't want the standard square marshmallow, and used a small heart shaped cookie cutter to make mine ready for Valentine's Day. And my other change was that during the final powdered sugar application process I'd make my marshmallow sugar coating in three different flavors: cinnamon spice, peppermint and chocolate.
This final flavoring process was achieved by sifting the powdered (icing) sugar with a mixture of cinnamon, nutmeg and clove. For the chocolate flavored I sifted baking cocoa in with the powdered sugar. For the peppermint I mixed peppermint extract into the powdered sugar and then sifted it several times. I've decided that the next time I will add the peppermint extract to the marshmallow mixture during the final whipping process.
Now there is no reason your marshmallows couldn't be chocolate (mine are all white) and just add chocolate to the marshmallow mixture. In fact, the mister has requested I experiement using chocolate chips melted into the 'batter' and I think that might work.
Would you like to try your hand at homemade marshmallows? Here is the recipe:

Just the basic ingredients are needed: sugar, unflavored gelatin, light corn syrup, salt, vanilla and confectioners' sugar (icing sugar).
You'll begin by dissolving the gelatin in a little water in your mixing bowl and setting it aside for 30 minutes. While it is dissolving you use a little saucepan on the stove and mix the sugar, corn syrup salt and water.
Then the fun begins when you cook the sugars. Be sure to use your candy thermometer and remove from heat once it reaches 244 degrees.

Then you'll CAREFULLY pour the hot sugar mixture into the geletin that has softened in your mixer bowl. Please use caution as the sugar mix is VERY hot so use the lowest speed when you begin to incorporate it into the gelatin in the mixer.
Once you've incorporated the sugar and gelatin the fun begins. Turn your mixer on high and let it whip (use a whisk attachment) for 15 minutes. I loved watching the mixture turn into thick marshmallow as it mixed....just like magic!
Now you'll add two full tablespoons of vanilla to the marshmallow mixture.
Next, you are going to prepare a glass dish/pan with a dusting of confectioners' sugar. The original recipe calls for plain confectioners sugar but you can see that I deviated from the recipe and made three different flavors of confectioners' sugar (cinnamon spice, peppermint and chocolate.) Remember, I was experimenting with flavors and next time I'm sure I'll use all the same flavor or plain confections' sugar in my pan.

Then I got my handy mister to pour the marshmallow over the confectioners sugar so I could take the photo.

Once you have it all covering the bottom layer of confectioners sugar, you'll sift a top layer of confections sugar over the top in the same manner as before.
Set your dish of marshmallow mixture aside overnight to set and dry. Do not cover it.
The next day you'll turn the marshmallows out onto a board or parchment paper and cut into 1 1/2" squares or into shapes using a cookie cutter. Be sure to heat the knife or metal cutter first. It cuts very smoothly if warmed.
And here they are, my three different flavors of heart shaped Valentine Marshmallows.
Here is the written recipe:

Fluffy, Soft and Yummy Homemade Marshmallows
Ingredients:
2 1/2 Tablespoons unflavored gelatin (three packets worked for me)
1 1/2 cups granulated sugar
1 cup light corn syrup
1/4 teaspoon salt
2 Tablespoons pure vanilla extract
Confectioners' sugar (Icing sugar) for dusting
Optional: cinnamon, nutmeg, clove, chocolate, peppermint for flavoring the confectioners' sugar dusting.

Directions:
Combine gelatin and 1/2 cup cold water in the bowl of an electric mixer with whisk attachment. Let this stand for 30 minutes to soften the gelatin.

While the geletin is softening in the mixer, combine granulated sugar, corn syrup, salt, and 1/2 cup water in a small heavy saucepan on the stove; place over low heat and stir until sugar has dissolved.

Clip on a candy thermometer and raise the heat to high. Cook syrup without stirring until it reaches 244 degrees (firm ball stage). Once the temperature reaches 244 degrees, immediately remove pan from heat.

With the mixer on low speed, slowly and carefully (this is HOT sugar mixture!!) pour the syrup into the softened gelatin. Increase the speed to high and beat until the mixture is very thick and white and has almost tripled in volume, about 15 minutes. Add the vanilla and beat to incorporate.

Generously dust an 8" X 12" glass baking pan with confectioners' sugar. Pour marshmallow mixture into the pan. Dust the top with more confectioners' sugar. Wet your hands and pat the top to smooth it as you will notice a few bubbles may rise. Dust the top with confectioners' sugar again and let your marshamallow pan stand overnight, uncovered, to dry out and set up.

The next day turn out the marshmallow mixture onto parchment paper or a cutting board and cut the marshmallows into squares with a dry hot knife or with a metal cookie cutter of desired shape. Dust one more time with confectioners' sugar.

This recipe will make about 40 marshmallows about 1 and 1/2 inches in size.
I am putting together some valentine treats with these marshmallows included so check back tomorrow for my Valentine sweet treats.


homework


Shared on Carolyn's HOMEWORK blog
 
 I've been invited by Lisa at SWEET AS SUGAR COOKIES blog to add my homemade marshmallows to her featured SWEETS FOR SATURDAY #3 post. Click her link and enjoy MANY recipes for delicious sweet treats.

Cheers!
Jennifer