Sunday, April 28, 2013

Cake Dome Sunday #19: Peanut Butter Pretzel Truffles


Today was an absolutely, positively, undenyably gorgeous/wonderful day outside!  One could not have requested in detail a more beautiful spring day than we had here today in the Ottawa Valley.  The Mister and I spent the entire day outside: me working in the yard and the garden, he on his car and a few outdoor "honey-do" list chores I had for him.
 

Consequently, I didn't bake anything special for the Mister today.  BUT, that is not to say that I didn't mix up something this evening to satisfy his sweet tooth and to put under the cake dome.  Today I made Peanut Butter Pretzel Truffles.
 
There are three steps to putting together these delicious little gems and I was able to complete each step between fixing dinner and cleaning up the kitchen.
 
I don't know about you but I have a real thing for peanut butter and chocolate and these truffles have the added saltiness and a slight crunch from the pretzels.  Oh so good! 


Peanut Butter Pretzel Truffles

Yield approximate 2 1/2 dozen...depending on how large or small you form the truffle balls.

Ingredients:

For the filling:

1 cup creamy peanut butter
1/2 cup plus 2 tablespoons confectioners' sugar
2 tablespoons unsalted butter, at room temperature
2 cups  crushed pretzels

For coating:

12 ounces bittersweet chocolate, finely chopped (I used 3/4 bittersweet and 1/4 semi sweet...because that is what I had)

For the Drizzle:

1 tablespoon creamy peanut butter
1 tablespoon milk
4 - 6 tablespoons confectioners' sugar

Directions:
  1. To make the filling, combine the peanut butter, confectioners' sugar, butter and pretzels in a medium bowl.  Mix well with a spoon until evenly combined and all ingredients are incorporated.  Roll the mixture into small balls about 2 - 3 teasoons worth each. (I sprayed my hands with PAM baking spray.  the ingredients will be very sticky-to-your fingers while rolling)  Place on a baking sheet lined with foil, parchment, or waxed paper.  Transfer to the freezer to chill for at least 30 minutes.
  2. Place chocolate in a heatproof bowl set over a bowl of simmer water.  I used a double boiler.  Dip chilled peanut butter-pretzel balls in the chocolate, gently shaking off the excess.  Transfer back to the lined baking sheet and chill to let the chocolate fully set up.
  3. To make the peanut butter drixzzle, combine the peanut butter and the milk in a small bowl.  Microwave briefly (About 15 seconds).   Add in the confectioners' sugar and whisk until the mixture is smooth.  Adjust consistency as needed with additional confectioners' sugar.  Drizzle over the coated truffles.  Let set before packaging or serving. 


I always make Peanut Butter Balls (some folks call them "Buckeyes") during the holiday season and these Peanut Butter Pretzel Truffles are very similiar with the exception of the added chopped pretzels.  The pretzels add just the right amount of salty to the rich sweetness of the chocolate and peanut butter. 
 
Ya gotta try them!  Seriously!  They are so good.
 
Until next time,
Cheers!
 
Jennifer


Linked to these parties:
 
Aderberry Hill Make the Scene Monday #72


Monday, April 22, 2013

Earth Day 2013: Airing my laundry


Today is Earth Day!   And as a special day that is intended to inspire awareness and appreciation for the Earth's natural environment I decided to air my laundry in public!  GASP!  What did I say?  (just checking to see if you were paying attention.)  *giggles*


I was taught from a young age that airing your dirty laundry in public is inappropriate and just plain wrong.  Of course being a child who watched and helped her mother and grandmother hang clothes outside on the clothesline on washday I imagined it would be strange to hang dirty clothes outside anyway.  You need to wash them FIRST and then air them...when they are clean.

However, I am going to air my dirty laundry in public right now, but not as in the metaphor.  In a concerted effort to save money and to be kinder to the environment, about three weeks ago I decided to try making my own laundry detergent.  The Mister and I have been working on our household budget and looking for ways to save money.  With the price of laundry detergent being exhorbitant (did you know that in some stores they've actully put security locks on detergent to prevent shoplifting?!)  It is true.
So off I went on my search for the how-to of making laundry detergent.  What I discovered is, it couldn't be more simple! 


Homemade Laundry Soap Powder
All you need are three key ingredients:
  • 1 bar of shaved bar of laundry soap note: I used Linda Laundry Soap, but you'll also find other brands like Ivory, ZOTE, Fels-Naptha, Pure & Natural, or choose a handcrafted soap.
  • 1 - 76 ounce box of 20 Mule Team Borax
  • 1 - 55 ounce box of Arm & Hammer Super Washing Soda

Instructions:
  1. First, find a plastic container with a lid to mix your soap powder in. I used a recycled gallon-size ice milk bucket, but anything you have on hand that has a lid is fine.
  2. Grate the bar of laundry soap as finely as possible into your container. You can do it in your food processor if you have a fine grating blade or do it by hand with a hand held grater. I did it by hand and it didn't take long at all.
  3. To the finely shaved bar of soap mix in 1 cup of 20 Mule Team Borax and 1 cup of Arm & Hammer Super Washing Soda.
  4. Mix these three ingredients together with an old wooden spoon or paint stirring stick.
THAT'S IT!  You've just made your first batch of Laundry Soap Powder!


So now that you've made your soap powder, how do you use it? First of all, and I didn't believe it when I first read it, but you aren't going to need more than 1 tablespoon or two. Yes! I said TABLESPOONS! I use 2 heaping tablespoons because my washer has a large tub/capacity and I'm a doubting Dora here. But that really is enough.

Put your soap powder mixture into your washer and let it fill with water.  While the washer is filling, clean the cat litter box, separate your laundry into darks, lights and white...multi-task for the few minutes it takes for your washing machine to fill with water.  It IS important to be sure that your soap powder is disolved before adding clothes.  I have read that sometimes if you just toss your clothes in and put the detergent on top that the soap powder doesn't fully dissolve. 

For heavily soiled clothing you can still pretreat and/or add a little more powder.  There is no problem using a little bleach if you are accustomed to using bleach with whites (especially dirty white sweatsocks that someone I know needs extra cleaning)!

PLEASE NOTE:  This is an important "please note" notice.  The laundry soap powder doesn't get sudzy.    That is a little disconcerting at first because you might equate clean with soapy/bubbles in your wash water.  Well...this doesn't.  But it DOES clean.

Now for the great cost cutting report!  This is INEXPENSIVE to make.  You are going to get about 8 or 9 recipes out of the box of Borax and about 13 recipes out of the box of washing soda.  AND, both of those ingredients are about $5.00 each (depending where you live...here in Canada they are slightly more, but then so is the cost of commercial laundry detergent.)  And out of one small pail like the one I've made, you'll probably get two to three months from it before having to mix a new batch which then you'll only need a bar of laundry soap to grate and it is about $1.50.    I've read reports that this recipe costs less than $1.00 PER MONTH! Not load but MONTH!  Super savings, right?!?

Last thing most folks ask is "Where do I find Washing Soap, Borax and Washing Soda?"  All three of these are found in the laundry eisle of your grocery store, Walmart or whereever you buy your laundry products.    I had never noticed them before but sure enough, they are there.


Without sudsy water going into our rivers and streams as well as harsh chemicals and their effects on sensitive skin, this makes this homemade Laundry Soap a very environmentally friendly product that can be made inexpensively and very, very easily.
 
Happy Earth Day! I'd love to hear your tips for preserving the environment.

Until next time,

Cheers!

Jennifer
 
 
Shared at these parties:


Alderberry Hill  Make the scene Monday

Homework

Have a Daily Cup of Mrs. Olson  (Share your cup Thursday #55) 


Sunday, April 21, 2013

Cake Dome Sunday #18: Georgia Peach Pie


This week I made The Mister a Georgia Peach Pie.  I must confess, I intended to make him a Rhubarb pie, but there is not any Rhubarb at all (neither fresh nor frozen) to be found in these here parts.  Not yet, anyway.  But I did have one last jar of peaches I'd canned last summer so I asked him if he'd mind instead of Rhubarb to have a Peach pie.  He said that was fine.


I discovered this recipe for GEORGIA PEACH PIE on the Crisco website and chose to make it because it was made a bit differently than my usual Peach Pie.  I liked the idea of the buttermilk, cornstarch, butter and eggs for the filling with the peaches.  We were not disappointed.


For my pie crust I made it using butter instead of shortening or lard.   It is very flakey, tender and delicious in taste and the texture is outstanding.  I will not say that this is the only way to make perfect crust.  I'll just say that this is how I like to make mine and I think they are outstanding.

Georgia Peach Pie

Ingredients:
  • Double Pie Crust
For the filling:
  • 1 (29 oz.) can yellow cling peaches in heavy syrup, reserve 3 tablespoons of the liquid
  • 3 tablespoons cornstarch
  • 1 cup of sugar, divided
  • 3 large eggs
  • 1/3 cup buttermilk
  • 1/2 cup butter, melted
  • 1 teaspoon vanilla extract
For the glaze on top:
  • 2 tablespoons butter, melted
  • sugar (turbinado sugar to sprinkle over top crust)
Directions:
  1. Prepare recipe for a double crust pie, using a 10 inch pie plate.  Roll out dough for bottom crust and place in pie plate according to recipe directions.  Do not bake.
  2. Preheat oven to 400 degrees F.
  3. Drain peaches, reserving tablespoons syrup; set aside.  Cut peaches into chunks.  Place in large bowl.
  4. Combine cornstarch and 3 tablespoons of sugar in small bowl; add reserved peach syrup, remaining sugar, eggs and buttermilk.  Mix well
  5. Stir in melted butter and vanilla; pour mixture over peaches.  Stir until peaches are coated.  Pour filling into unbaked pie crust.  Moisten pastry edge with water.
  6. Roll out dough for the top crust, place onto filled pie and finish edges (I used a rope braid twist finish).  Cut slits or a design in top crust or prick with a fork to vent steam.
  7. Brush top crust with melted butter and spinkle lightly with turbinado sugar.
  8. Bake 30 to 40 minutes or until filling in center is bubbly and c rust is golden brown.  Cool to room temperature before serving.


And how can you go wrong with a ball of ice cream on top making it Georgia Peach Pie Ala Mode! DEEEEeeeeeeeelicious!
 
Until next time,
Cheers!
 
Jennifer


This post shared at:

Alderberry Hill  Make the scene Monday

Homework

Have a Daily Cup of Mrs. Olson  (share your cup Thursday #55)


Wednesday, April 17, 2013

An Old Friend


Slowly but surely, I've been cleaning up my stamping studio, straightening out pattern paper sheets, going through ink and markers (why do I still have dried up ones?) and trying to get stamps better organized, which means rediscovering stamp sets that I've had for ages but haven't seen ink in too long of a time. 

For this card I used a very old, retired Stampin' Up! set, titled Old Friends.  To color, I got out my Prismacolor Pencil.  The case of colored pencils hadn't been opened for much too long of a time.  I've gotten more or less into the habit of using Copic markers and had forgotten how relaxing I used to find it to color with the pencils. 

This month's theme challenge for the Challenge Chicks is to do some spring cleaning and gather up old supplies and use them.  This card definitely fits the challenge using the old stamp set as well as Prismacolor pencils.


Card Recipe:
Stamps:  Stampin' Up! Old Friends
Ink:  Memento Tuxedo Black
Paper:  Papertrey Ink
Embellishments: Martha Stewart Eyelet border punch, SU Baker's twine, miscellaneous button from the button jar, stickles glitter glue, image colored with Prismacolor pencils.

YIPPEEEEEE!  It is a rainy week and that means..........drumroll please............THE SNOW IS FINALLY BEING WASHED AWAY!  I began to think we'd have snow on the ground until August!  There are still a few piles along the fence line and on shaded sides of the house, but for the most part, it is gone.  Come on spring flowers...GROW! 
 
Until next time,
Cheers!
 
Jennifer

Sunday, April 14, 2013

What's under the cake dome Sunday # 17: Lunch box treats


Today I have been baking for the Mister, as I usually do on Sundays.  But today's isn't one dessert, but rather I've baked up treats to pack in his lunch box for the coming week.
 
First comes his breakfast treat.  The Mister leaves for work at 5:45 a.m. and he doesn't take time to eat breakfast at home, but does appreciate a yogurt sundae that I make him most mornings.   It is very simple to layer plain Greek yogurt with honey, a layer of granola and a layer of blueberries (or other fruit) and send that in with him for a mid morning boost with his coffee.  This week, though, I baked for him GIANT BLUEBERRY MUFFINS with a Streusel topping.  This is my favorite recipe for a big, flavorful muffin.  They're fast to make and once they've cooled I put them in individual zip lock bags and throw 'em in the freezer.  This way every morning I just take one from the freezer for his lunchbox and it has thawed by the time he's ready to eat it.


To Die For Blueberry Muffins

Ingredients:
  • 1 1/2 cups all-purpose flour
  • 3/4 cup white sugar
  • 1/2 teaspoon salt
  • 2 teaspoons baking powder
  • 1/3 cup vegetable oil
  • 1 egg
  • 1/3 cup milk
  • 1 cup fresh (or frozen) blueberries
Streusel topping:
  • 1/2 cup white sugar
  • 1/3 cup all-purpose flour
  • 1/4 cup butter, cubed
  • 1 1/2 teaspoons ground cinnamon
Directions:
  1. Preheat the oven to 400 degrees F (200 degrees C).  Grease muffin cups or line with muffin liner papers.
  2. Sift together in a large mixing bowl 1 1/2 cups flour, 3/4 cup sugar, salt and baking powder.  Place vegetable oil into a 1 cup measuring cup; add the egg and enough milk to fill the cup.  Mix this with the flour mixture.  Fold in the blueberries.  Fill the muffin cups right up to the top with batter (the batter will be fairly thick/stiff).
  3. Now make the streusel topping:  mix together 1/2 cup sugar, 1/3 cup flour, 1/4 cup butter and 1 1/2 teaspoons of cinnamon.  Mix with a fork and then sprinkle over the muffins before baking.
  4. Bake for 20 to 25 minutes in the preheated oven, or until done.
This recipe will yield 8 or 9 LARGE muffins.

Enjoy!


After I finished the blueberry muffins it was time to bake some cookies for his lunch dessert which is usually fresh fruit and some type of sweet. This afternoon I made a batch of Snickerdoodle cookies. I've posted this recipe before. Next to chocolate chip cookies I think snickerdoodles are a very close 2nd place favorite. They're light, slightly chewy, buttery and oh so good.


Last fall I posted the recipe for Snickerdoodles and you can find it on THIS POST HERE.  These are also very fast to mix up and bake.  I'm looking forward to a big glass of milk and a SNICKERDOODLE or two after supper tonight.  Ooops...you caught me...I've already sampled. 


And since I was in a major baking mode, I knew I couldn't forget my pups.  They like to have a treat too, so I made a batch of Pumpkin/Peanut Butter dog biscuits for them and filled their good dog treat jar back up.  The recipe for this, my homemade dog biscuits, can be found HERE.


This weekend has sped by! I'm glad to have my week's worth of dinner menus figured out and the Mister's lunches too. I truly am happy to pack his breakfast and lunch each day and know that he is getting a decent meal while at work. Just wish I didn't have to pack the lunches at 5:30 a.m. so it is always good when I know in advance and have prepared what I'll need to make. I'm going to mix up some tuna salad for sandwiches tomorrow and chill that. Some veggie sticks with his sandwiches and fruit and cookie ought to tide him over until supper tomorrow.

This was a strange "cake dome Sunday" post, but I did bake and the Mister just came in from working on his car, grabbed a handful of cookies that are cooling on the counter and gave me a big smooch and said "Yummm...these are good!"

Mission accomplished!

Until next time,
Cheers!

Jennifer

Saturday, April 13, 2013

Saturday morning

Yesterday we got hit with another 8 inches of snow. It was not a pretty snow storm either. Not the kind that is fun to play in.  It was icy, the wind blew hard and the snow and ice pellets blew sideways all day.  This morning the temperature is above freezing and though it is quite chilly and damp out, the snow is turning to slush, mud and the puddles are beginning to freeze as ice.  Not the pretty Saturday morning I had hoped for.


I really had hoped to be able to play with "my girls"  (my mares) but decided instead to use this day to clean tack, straighten up my tack box, replenish supplies and of course I had to snap a few photos of Flower and Gypsy.


Flower looked quite comfortable in her shelter. 


I do believe she was posing for me. 


Gypsy and her girlfriends were up on the hill enjoying the cool morning.


The Mister and his buddies spent the morning mounting the body of his Cobra (replica) to the chassis. The mister has been building this vehicle for the past two years and it is nearly finished.

He and I have disparate interests. Perhaps that is why we get along so well. As the saying goes, "opposites attract." So this was our Saturday morning. I hope you had a good one too!

Until next time,
Cheers!

Jennifer

Thursday, April 11, 2013

Tea Time


As soon as these new stamp sets arrived and I could hardly wait to ink them up.  In fact, I didn't wait and got down and inky right away.  For my first cards (I made two the same) I used this week's MOJO MONDAY sketch challenge #288 for the card layout but kept it fairly simple.


Card Ingredients:
Stamps:  Papertrey Ink
Designer Paper:  Papertrey Ink
Ink:  Stampin' Up! Real Red (colored the leaves with leaf green copic marker)
Embellishments: Stampin' Up! bias tape, Nestabilities Octagon and Scalloped Octagon dies, machine stitching
 
That is all!  Fast and simple.  This set has a number of different teapot designs as well as cups and a lot of little extras and sentiments to use.  I know it is fast going to become one of my favorite stamp sets. . . but then. . . all stamp sets tend to gain the title as favorite at some point.


Hope you are having a TEA-riffic day. We are bracing for about 8 inches of snow tomorrow. Yes! I said SNOW. I'm not thrilled about that at all but this too shall pass.
Until next time,
Cheers!
Jennifer

Monday, April 8, 2013

Hello Sunshine


Hello, Sunshine!  For me, this is not so much a greeting but a plea for the sun to come out.  If it isn't snowing then it is raining and then it is snowing again.  And while I'm whining about the weather, I'll just add that I really want to see the tulips and daffodils blooming.  And furthermore, I would just love a pair of muck boots as cute as these for wearing to the barn or in the garden.
 
Tee hee hee...the wish for sunshine, flowers and pretty boots is partially the inspiration for this card.  In truth, the real inspiration for this card was a card made by Dina Kowal that she posted on her blog Mama Dini's Stamperia in which she used rain boots and umbrellas and I just loved it.  HERE is Dina's card.  It is gorgeous!
 
Card Ingredients
 
Stamps:  Impression Obsession (boots), My Favorite Things (umbrellas) and Papertrey Ink (sentiment)
Ink: Stampin' Up! Ballet Blue and Memento Danube Blue.  Image colored with copics

Cardstock:  Stampin' Up!
Embellishments: Nestibilities Labels die, Scoring tool, Glossy Accents, Stickles glitter and Prima Flower and crystal


I hope you have sunshine and daffodils where you are.

Cheers!

Jennifer


Sunday, April 7, 2013

Cake Dome Sunday # 16: Warm Chocolate Orange Tart

  At the end of February I had the extreme pleasure and honor of attending a class taught by Chef Anna Olson at Ottawa's Le Cordon Bleu Culinary Institute. I raved about the day and if you'd like to read more about my class you can by clicking HERE. One of the fabulous desserts that Chef Olson made that afternoon was her Warm Chocolate Orange Tarts. So today, for Cake dome Sunday #16,  I presented this recipe for the Mister's dessert.


This dessert is best served warm from the oven.  If you are pressed for time or want to serve this either as one large tart or as individual servings to dinner guests, you can make the chocolate pastry crust ahead of time and chill and mix up the filling to have ready to pour into the chilled shells just before serving.

A couple of helpful tips Chef Olson shared were:
  1. Sifting.  Yes, you may have gotten out of the habit of sifting but it really is necessary for a good outcome, especially when adding cocoa powder and/or icing sugar.  While flour comes to us presifted these days, cocoa powder and icing sugar are two ingredients that will be a bit lumpy if you don't sift first.
  2. Separating the egg yolk from the egg white.  Do you do it by the pour from one shell to the other, back and forth method?  Or do you have an "egg separator" utensil?  The easiest way to separate eggs is through your fingers.  Yes, your hands get a bit gunky but you will find that the white will flow through your fingers easily while the yolk stays in your hand.  And if by chance the yolk should break you can easily get the yolk out of the way of the white soas not to contaminate your whites that you want to whisk up fluffy.  I've been doing it with my hands ever since the class and it is ever so much easier.  I'll never switch back.
  3. Preventing soggy crusts:  This tip applies not only to this chocolate tart but to any custard or fruit pie that you bake the crust first and do not want for the pie to become soggy later from the filling after sitting in the refrigerator.  Simply brushing the crust with egg white as soon as you remove it from the oven and before adding the filling will create a barrier between the crust and the filling and will help prevent having a soggy crust.  Try it!  It works.


Warm Chocolate Orange Tart
(Makes 8 individual tarts or 1 large tart)

Chocolate Pastry:
  • 1/2 cup  unsalted butter, at room temperature
  • 1/2 cup icing sugar, sifted
  • 3 large egg yolks
  • 1 cup cake & pastry flour
  • 2 Tbsp cornstarch
  • 1/2 tsp. salt

Filling:
  • 1 egg white, lightly whisked
  • 3 large eggs, separated
  • 1/2 cup  sugar, divided
  • 2 tsp finely grated orange zest
  • 1 tsp vanilla extract
  • 1/4 cup Dutch Process cocoa powder sifted
  • 3 oz bittersweet chocolate, melted (but still warm)
  • 1 oz (2 Tbsp) orange liqueur

  1. For the crust, beat the butter and icing sugar until smooth, then add the egg yolks all at once and beat  until well combined.
  2. In a separate bowl, sift the flour, cocoa powder, cornstarch and salt.  Add this to the butter mixture and stir until evenly combined.  Shape the dough into a disc, wrap and chill until ready to use.
  3. Knead the chocolate pastry dough once or twice on a lightly floured work surface to soften, then roll out the dough to a circle just less than 1/4-inch thick.  Cut circle of the pastry to line a tart pan or, you can make individual tarts by lining eight 4-inch fluted tart shells (removable bottom is ideal), pressing the dough into the shell(s) and trimming away any excess.  Dock the pastry with a fork.  Chill the tart shells for at least 20 minutes.
  4. Preheat the oven to 350 degrees F.  Place the chilled tart shells onto a baking tray and bake them for about 18 miutes, until you see that the pastry has an even, dull finish.  As soon as the tart shells come out of the oven, brush the surface of the shell with 1 lightly whisked egg white (this creates a seal to prevent the filling from seeping in and making the crust soggy).  Allow to cool while preparing the filling.
  5. For the filling, whip the remaining 3 egg whites until foamy then slowly add 1/4 cup of the sugar, whipping on high speed until the whites hold a soft peak when the beaters are lifted.  Set aside.
  6. Whip the 3 egg yolks with the remainin 1/4 cup of sugar, the vanilla and orange zest by hand until pale and thick.  Fold the egg whites into this yolk mixture.  Gently whisk in the cocoa powder, then whisk in the melted chocolate and orange liqueur.  Pour this into the cooled tart shells and bake for about 8 minutes (oven still at 350 degrees F)  until the tarts just begin to lose the shine around the edges, but the center is still dark and glossy.  Allow the tarts to cool 2 minutes, before carefully removing from pan to serve warm.
NOTE:  Alternatively, you can prepare the filling, fill the tarts and chill them until ready to bake.  Simpley add an additional 2-3 minutes to the bake time.


The Mister and I enjoyed this rich chocolate tart with a glass of ice cold milk.  The orange zest and liqueur adds just the perfect hint of orange to balance out the richness of the chocolate.  Delicious!
 
I hope you are enjoying a lovely weekend!
Until next time,
 
Cheers!
 
Jennifer


Saturday, April 6, 2013

Enjoy the Moment

Calgon!  Take me away!  Do you remember those commercials?  I sure do and somedays everyone would like to have a few Calgone moments where you can just enjoy the moment!


I wanted to make a card that was feminine, lacey, floral and luxurious...something that would evoke thoughts of relaxation, pampering and a special "ahhhhhhhhh" moment.  The Rubber Romance Diva stamps are perfect for this theme.


Card Recipe:
 
Stamps:  Rubber Romance and Papertrey Ink
 
Ink: Memento Tuxedo Black and Tim Holtz Dusty Concord Distress Ink (Ranger).  Image colored with Copic Markers.
 
Designer paper:  This gorgeous paper was a gift and sadly there isn't a maker on it.  Would love to know because it is so pretty.
 
Embellishments:  Martha Stewart eyelet border punch, Prima flowers, Offray 1/8" satin ribbon, Martha Stewart lavender colored half pearls, Cotton Candy pink Stickles glitter, Bubbles covered in Glossy Accents dimensional glaze, crystal earring, Labels die cut and Offray purple grosgrain ribbon.


This looks like a relaxing way to end the day.  Don't mind if I do! 
 
Until next time,
Cheers!
 
Jennifer


Friday, April 5, 2013

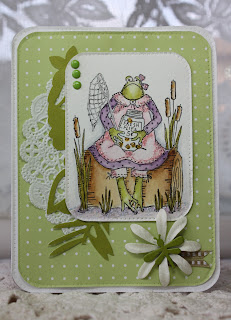
Frogs and Flies - you're too kind


This retired stamp set called "Frogs and Flies" makes me giggle everytime I use it.  The person to whom I'm sending this card has a great sense of humor and I think it will make her giggle too.


It has been a while since I've played along with Mojo Monday Sketch Challenge and this week's challenge #287 was such fun to play with using the fun Miss Froggie stamp.


On the inside of the card I added some more patterned paper and ribbon to carry the theme through.

Card Recipe:

Stamps:  Stampin' Up! Frogs & Flies, Sentiment from Papertrey Ink
Ink:  Memento Tuxedo Black and Autumn Leaves Pretty Poppies Green clear stamp ink, image watercolored with Tombow markers.
Paper:  Martha Stewart Playful Blue paper pad, Fabriano cold pressed watercolor paper
Embellishments:   Paper doily, Prima Flowers, MM brads, dragonfly brad from Making Memories (I think), Stickles glitter in Cotton Candy pink


I'd better get to the post office and mail my card.  Hope you're having a spectacular day!
 
Cheers!
 
Jennifer