Tuesday, June 15, 2010

Lavender Sorbet

Sweet! Refreshing! Frosty! That is how I would describe Lavender Sorbet. This simple sorbet is made using minimal ingredients but it is large on flavor and was a huge hit as our dessert last night.

Cooking with flowers is not something I've done a lot of. I had the misguided notion that flowers in food would be perfume-y in flavor. Not something I'd want in a dish. True, I've eaten batter fried squash blossoms and have had pansies in salad, but not too much more than that. Well! This Lavender Sorbet is not only very flavorful it is very, very refreshing.

Have I piqued your interest? Come join me and let's cook with flowers.


Remember yesterday I left you as I headed out to harvest some lavender. I've hung most of this basket in the basement for drying but decided to pull out some of the fresh lavender to use in the sorbet.

The ingredients are very simple and minimal. I decided to add pansies too for their color though you do not have to.

Let's get started:

Add sugar to water on the stovetop.

Simmer the sugar/water mixture for about 5 minutes.

Place the lavender in the food processer with a little sugar.

Isn't it pretty?

But after processing the sugar and lavender for about 3 minutes this is what it looks like. Not as pretty but that's ok. We'll now add the lavender/sugar mixture of the processor bowl to the sugar water mixture on the stove.
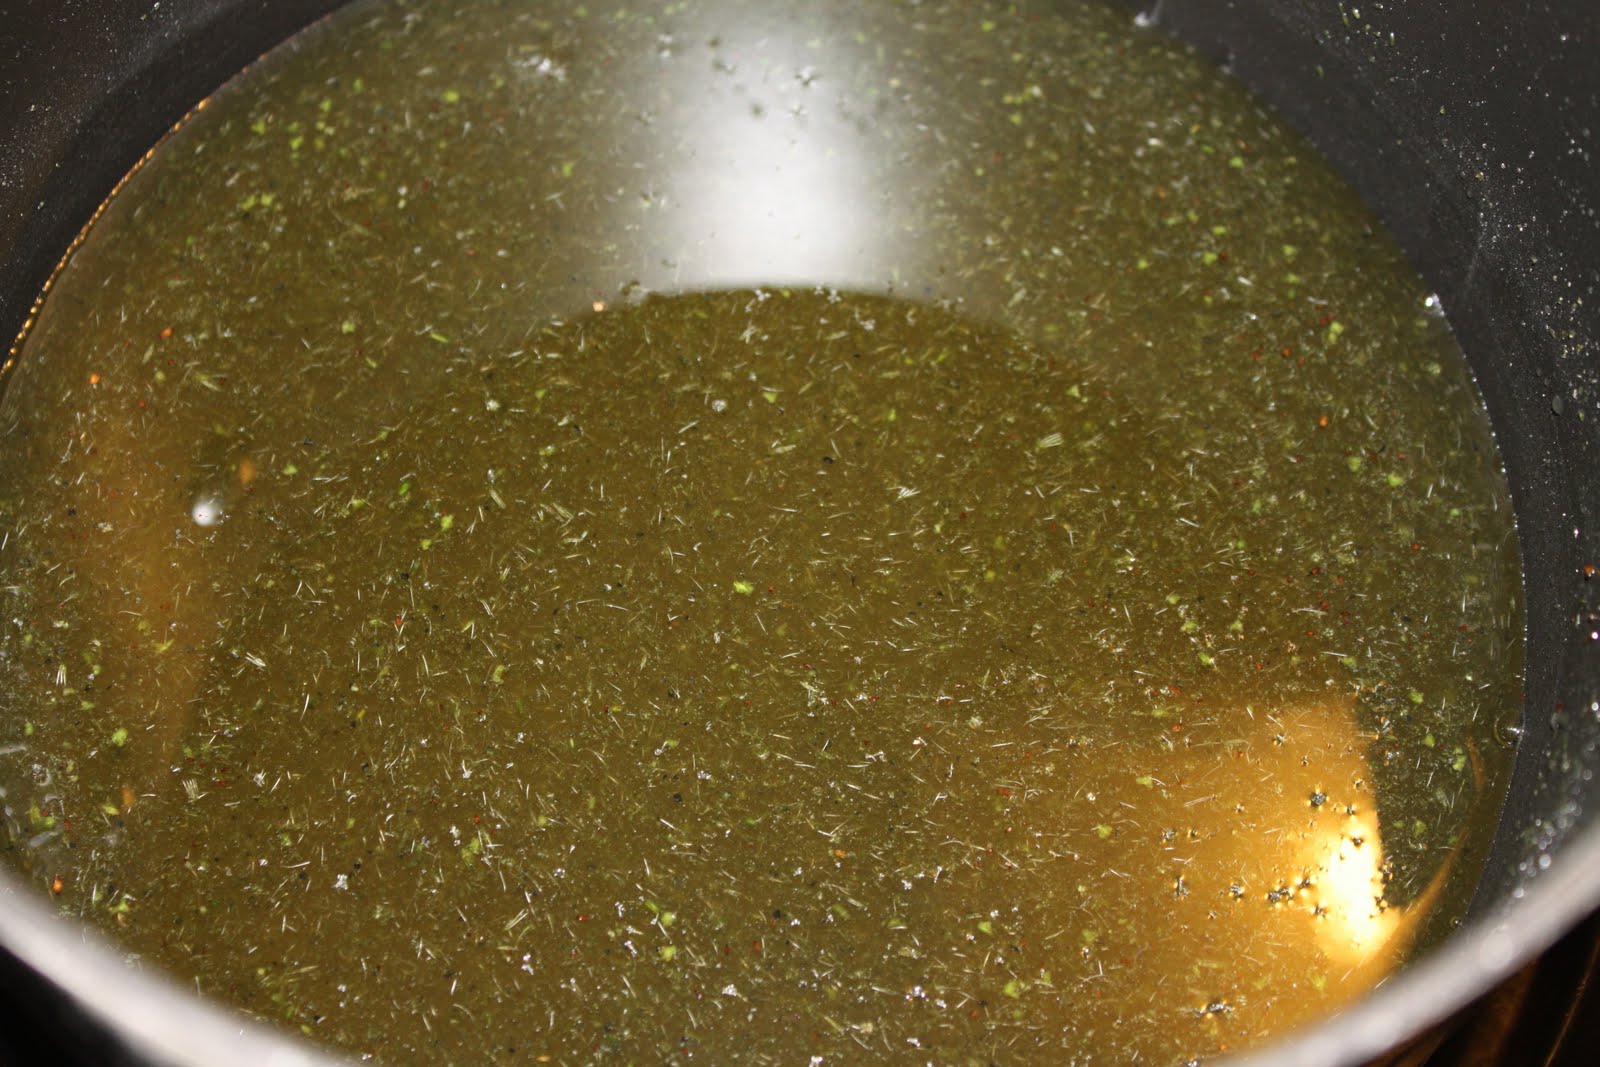
Stir and combine very well and let this rest for an hour to cool.

Once it has cooled be sure to strain it through a fine stainer. You'll be left with the lavender infused sugar water and the plants bits will be removed.
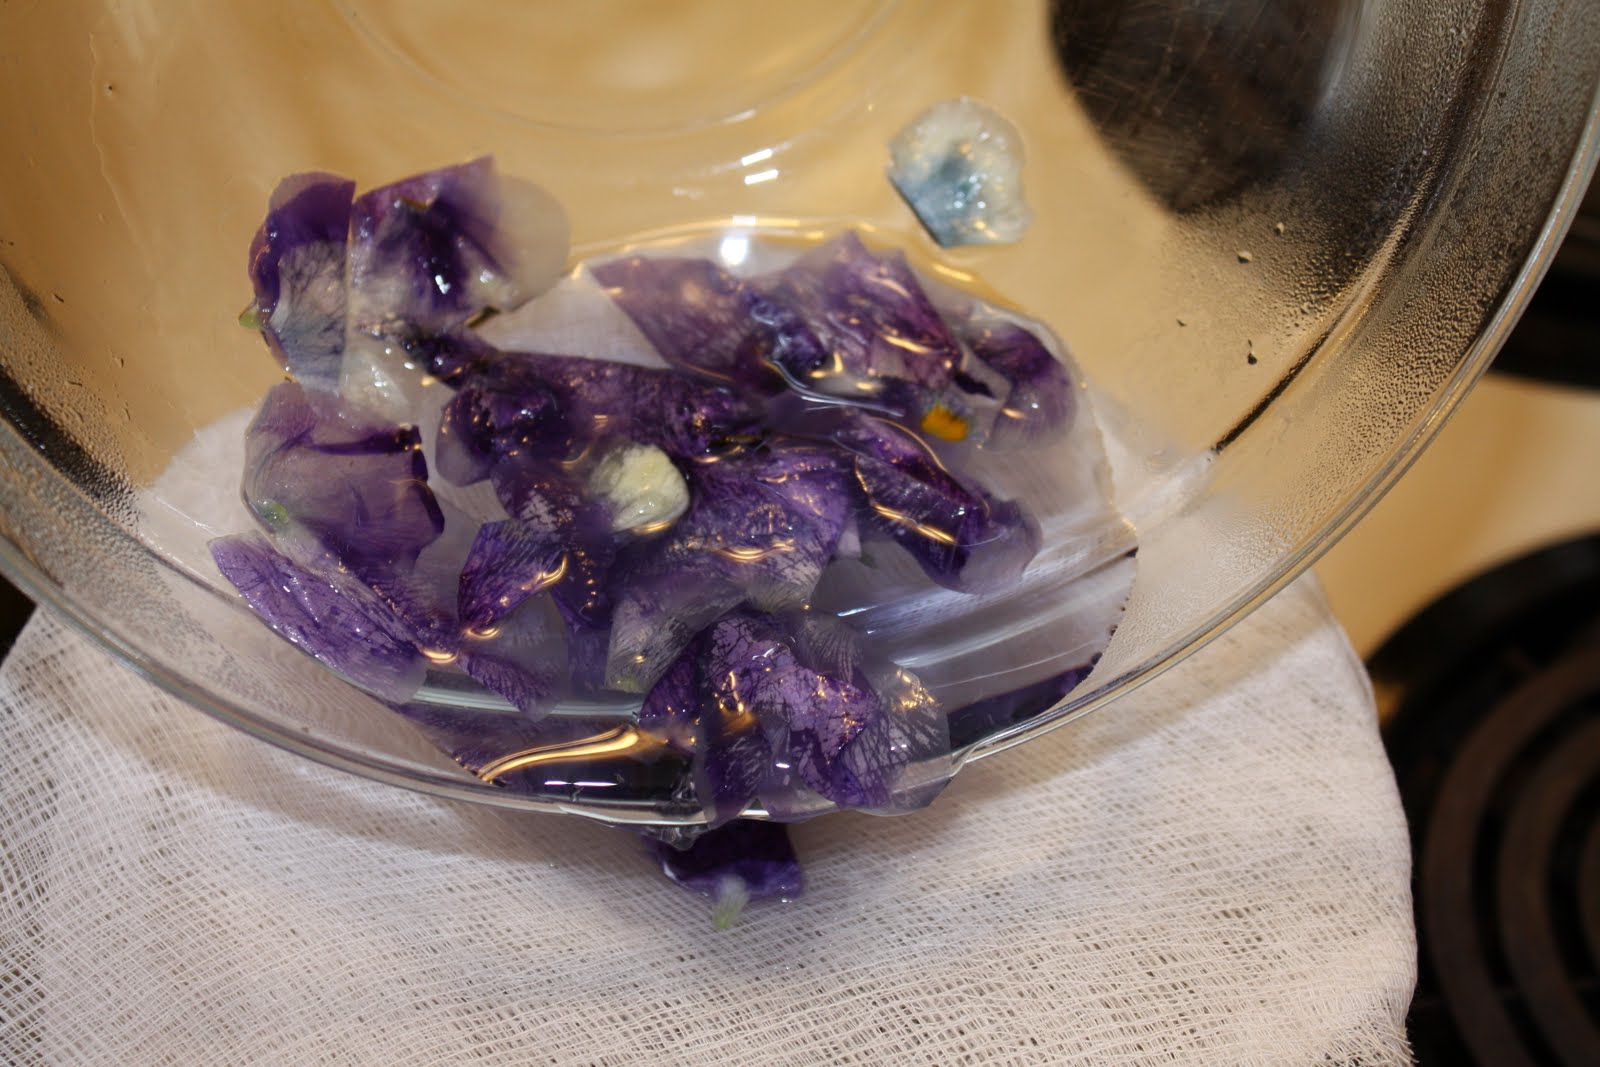
Now it is time to add the pansies. First place the pansies in a little boiling water in a bowl and let them steep for 15 minutes. Then pour through cheesecloth.

See the color you've gotten from the pansies?

Drip...drip...drip....it is natural purple dye.

Now we're getting serious. I added about 2 tablespoons of tequilla. You can add plain vodka or any type of alcohol you'd like. The reason for a small amount of alcohol is that alcohol does not freeze so its addition to your sorbet will keep it from freezing to ice once you are ready to chill the dessert. It WILL be frosty but will not freeze hard like an ice cube.

Final ingredient added: the lime juice. Now stir your mixture well and place in a freezer safe dish and chill. When it is almost frozen I put the icy mixture in the food processor and re-processed and then put it in my serving dishes and froze one last time. This makes a really nice smooth sorbet.

Look how pretty! I garnished with some more pansies but you could just as easily garnish with sprigs of lavender (which probably makes more sense since this IS Lavender sorbet!)

I sort of combined three different recipes I'd seen to come up with my own version using the simplest of ingredients. It is so easy to put together and you can make this up to three days in advance so if you have guests coming over and you can be prepared well in advance.

Lavender Sorbet
1 cup granulated sugar
2 cups water
1/4 cup fresh lavender flowers(food grade) (use 2 tablespoons of dried lavender if you don't have fresh lavender)
1/2 cup pansies (purple petunias or violets can be used too)
juice of one lime
2 tablespoons tequilla (or vodka) - optional

In a medium saucepan combine sugar and water until the sugar dissolves and simmers for about 5 minutes. Put the lavender and 1/4 cup of sugar in the food processor (or blender) and process for 3 minutes or until the flowers and sugar are completely blended.

Add the lavender mixture to the saucepan and cobine well and then let it stand for at least an hour. Strain the mixture and set it aside.

Bring 1/2 cup of water to a boil and pour it over the pansies and let the pansey/water steep for 15 minutes. Stir it occasionally.

Strain the pansey through cheesecloth and then squeeze the cheesecloth to release as much color as possible.

Blend the pansey water into the lavender syrup that you have previously set aside.

Add the tequilla and lime juice.

Place the mixture in a freezer safe contain and chill. Once it becomes frosty/icey put it back in the food processor (or blender) and re-process until smooth and then pour into serving dishes and put back into the freezer to freeze.

Can be made up to three days in advance.

Bon Appetit!

Jennifer

Monday, June 14, 2010

Can you smell the sweet scent of Lavender?

I'm not a huge fan of weeding. Nope! It is a gardening task that is necessary but not usually very enjoyable. Ahhhh, but there is one exception to the doledrums of weeding and that is when you need to pull weeds around the lavender plants. Ahhhhhhhhh and I'll say it again, "AHHHHHHHH." My lavender is really fragrant and lovely this year and just being near it is a pleasure no matter what the task at hand might be.

Who would think these tiny lavender flowers could produce such a lovely scent?

I have a tendency to brush against the plants as much as possible while I'm working in the area, just so I can smell like them. hee hee hee!

So delicate! So fragrant. So lovely!

I can always tell when Tango, my big orange cat, has been lying in or near the lavender. He doesn't eat it but he sure smells nice!

Over the next month or so I'm going to show you some really wonderful uses for these fragrant blooms. Uses ranging from potpouri, lingerie sachets, to culinary uses such as lavender ice cream, lavender lemonade...or if you want something just a bit stronger, lavender with lemoncello, lavender cookies...and even cards and crafts using lavender.

I'm heading outside now to cut and get the drying process started. And of course you know I'll come back in the house with my hands smelling of the delicate scent of lavender.

Cheers!

Jennifer

Monday, June 7, 2010

Mary Engelbreit thank you

Good sun shiney Monday morning! It rained all weekend and was quite cool too. I had so many plans to do outdoorsy things but since I couldn't do them due to the weather, I did something I've not done in ages! I STAMPED and made cards! YIPPEE SKIPPY! I had a good time and realize how much I miss stamping, despite the enjoyment I'm having from other activities.

This stamp is a very old Mary Engelbreit thank you stamp made by All Night Media. I have M.E. (Mary Engelbreit) on the brain because I've joined an apron swap that is using the M.E. theme. I may tuck in a set of M.E. thank you note cards in my partner's swap package.

It doesn't show in the photos but the glasses have clear dimensional glaze on them. The heart on her shirt is red liquid pearls. I used white liquid pearls for the dots on the scalloped edge too. And isn't the background paper yummy? It is from K & Company. I just love it and all of its coordinating papers.

The sun is definitely out so I'm going to scoot outside and work in the garden before our next rain passes through.

Thanks for dropping by! I've missed blogging and my blogging friends.

Cheers!

Jennifer

Wednesday, May 19, 2010

Serendipity Challenge - Stamped Notepad

Good Morning! I have been a rather quiet blogger lately, but life sure has not been quiet. Days are filled full to the brim for me with puppies, cats, my horse, sewing, stamping, gardening, preparing for next month's cello recital and the normal day to day activities. I LOVE SPRING! Spring brings new life and also brings life to old life! I'm having a blast! Consequently, though, I'm not getting nearly as many of my projects posted. I hope to remedy that situation very soon though so I hope you'll not give up on my blog.

Today I have a challenge project presented to the design team at Serendipity Stamps. The challenge is to create a design for a notepad using Serendipity Stamps. I decided that I would create a small whiteboard for the refrigerator to list errands to run and places to go.


This is my notepad/whiteboard that was very simple to create. If you'd like to do something similiar or perhaps use this as a craft idea for young children to create as gifts or VBS projects, this is how I made it.

I used a piece of heavy glossy cardstock and then computer generated the sentiment at the top but you can easily stamp or even hand write your message if you choose to have one. Next I stamped SERENDIPITY STAMPS Tennis Shoes #221QCL at the bottom and colored them with copic markers. Then all you have to do is run your cardstock through a laminator and VOILA! You have a whiteboard. I've added a water soluable marker to my board so my messages will not be permanent, but rather wipe of with a damp cloth. On the back I placed a magnet strip and here you see my whiteboard clinging to my refrigerator.
It was as simple as that: stamp, color, laminate and attach pen and magnet.

The rest of the Design Team have some fabulous notepad ideas using Serendipity Stamps. Be sure to hop on over to the team's blogs:

Amy Cokley
Anya Schrier
Kathie Bailey
Lynda Benden

Thanks for stopping by.

Cheers!

Jennifer

Monday, May 10, 2010

Just because I care


I am in a card swap in which were are instructed to make card fronts only, each one the same, but the sentiment on each front will be for a different occasion. We are also instructed to be sure that there are spring or summer flowers on the front. I love this PSX stamp so much and as I put the card fronts together I decided to make several extra for me to keep for myself.
So this is my card all made up in card form. This tulips in a pail stamp is among one of the first stamps I purchased years and years ago. It is well love, much inked and used often. It takes on a new look each time I ink it up.
Card Recipe:
Stamps: PSX and the sentiment is Stampin' Up!
Paper: All cardstock is Stampin' Up! The velum is called Red Heart Buds by Susan Branch
Ink: Momento Tuxedo Black and Autumn Leaves Brand: Red
Accessories: Copic Markers, Dashes, Dots & Checks ribbon, Stickles, Machine Stitching.
It is a pretty simple card but a very versatile card, I think.
Thanks for dropping by.

Cheers!

Jennifer

Saturday, May 8, 2010

MAY! And Mother's Day too.

This is just too good not to share with you. I wish I had the same enthusiasm for cleaning. Perhaps I should take this little poem to heart and smile through the spring cleaning.

Just wanted to wish all MOTHERs everywhere a very happy Mother's Day tomorrow. I know Mother's Day is celebrated on different dates in various countries. Here in North America we honor our Mothers tomorrow.

Happy Mother's Day and Happy May too.

Wednesday, May 5, 2010

Masculine card challenge - Serendipity Stamps

Good Morning! Puppy Noah really loves to greet the day as soon as possible with lots of tail wagging and "happy to see you" kisses. Nothing better than being greeted with such happy enthusiasm!

Today's challenge at Serendipity Stamps is to create a Masculine Card. Serendipity Stamps has MANY wonderful stamps that are perfect for cards and projects for the men in your life.

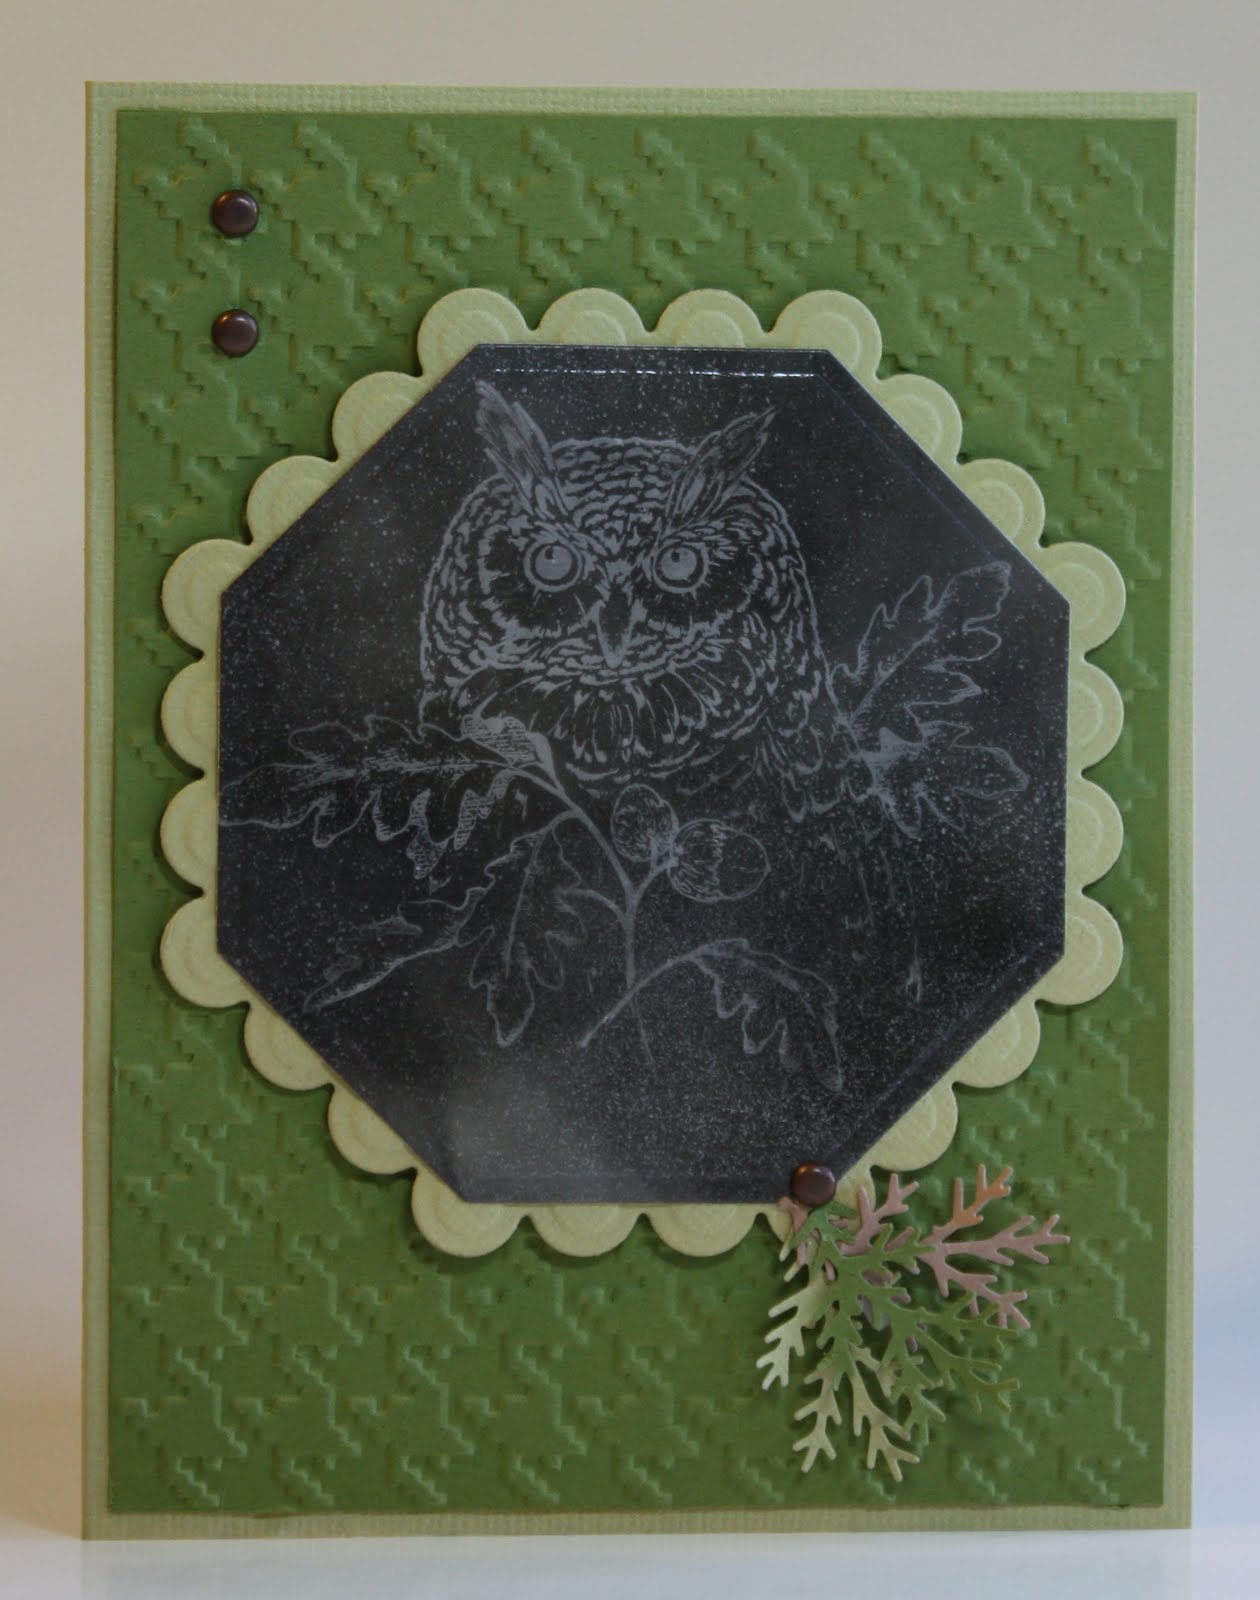
I love this hooty owl stamp and decided that I wanted to highlight him by using the soot stamping technique. Have you tried soot stamping? It is very fast and simple, but not for the faint of heart. I set two sheets of gloosy cardstock on fire while sooting up my image. But not to worry! The house is still standing.

Soot stamping is the process by which you press your stamp (no ink needed) into the a layer of soot that has been left on the glossy cardstock. When you lift your stamp, the stamp picks up the soot and leaves the image. Next you spray with a clear acrylic sealer spray to set the image permanently. See the detail that is left?

Want a brief tutorial on soot stamping? Here you go:

1.) Using a piece of glossy cardstock, turn the cardstock glossy side down and with the flame of a lighted candle, allow the flame to "kiss" the glossy side of the cardstock. Move the candle around quickly in a swirly or circular motion over the glossy side and NEVER let the wick or wax part touch the cardstock...ONLY let the flame kiss the glossy side and you'll quickly see black soot left.

2.) Take your stamp and press it into the soot firmly, being sure your fingers DO NOT touch the soot (it smears very easily).

3.) Lift your stamp carefully and immediately spray the image with a clear sealer.

It is as simple as that! Once the sealer dries you have your image ready to be made into a card.

CARD RECIPE:
Stamps: SERENDIPITY STAMPS "Autumn Owl" # 1182G
Cardstock: Stampin' Up! and Bazzill and no name glossy cardstock
Accessories: Nestibilities Octagonal and scalloped octagonal dies, Cuttlebug Houndstooth embossing folder, Martha Stewart fern leaf punch, Brass Brads, foam tape, candle.

For more Maasculine Cards using Serendipity Stamps, be sure to check out the rest of the Serendipity Design Team members work:

Amy Cokley
Anya Schrier
Kathie Bailey
Lynda Benden

Cheers!

Jennifer

Monday, May 3, 2010

Bathtime for Noah

This may very well be the last time Noah can be bathed in the kitchen sink. Noah had been having a very busy and happy day playing in the dirt with Gabe and Paige. You know what that means? "It's bathtime!"


Monday, April 26, 2010

Pink and Black Polka Dot Apron card

Before I put my apron swap package in the mail to my polka dot apron swap partner (see post below) I wanted to include a card with her surprises and introduce myself. This is one of my favorite apron stamps and lends itself well to paper piecing. The apron stamp is by Lockhart Stamp company and the sentiment stamp (Queen for a Day) is from Anna Griffin.

Time to wrap up the package and get it in the mail now.

Cheers!

Jennifer

Sunday, April 25, 2010

Polka Dot Pretties Apron Swap

Once again, I've joined an apron swap and this time the theme was "POLKA DOT PRETTIES". What's more fun than a festive polka dot apron to wear while baking up some kind of yummy goodness in the kitchen? This is the apron I made for my secret partner.

I've been seeing handmade bows on garments, headbands and apron pockets in books and magazines so I decided that this polka dot pretty could use a big bow on the pocket too. I don't know why, but it reminds me of Lucille Ball or at least something that I Love Lucy would wear.

I wanted to include a little something extra for my secret partner to coordinate with her apron so I made her this matching hot pad. The top of the hot pad has pockets in which you put your thumb in on one side and your fingers through the other and then just pinch the pot handle or pan.

See how it works?

Each participant is also to include a cookbook of any type you'd like. I am sending my partner a special cookie cookbook. I must say that I've glanced through it and I may have to go back and get my own copy of it. There are some yummy looking cookie recipes in it.

So tomorrow I'll wrap up and mail all of this polka dot pretty goodness to my secret partner. I hope she'll enjoy it.

Cheers!

Jennifer

Wednesday, April 21, 2010

Magnetic bookmark

Today's Serendipity Stamps design team challenge is to create bookmarks stamped and embellished with Serendipity Stamps. The stamp I used for my bookmark is a new design. It is titled STAMP OF APPROVAL and is catalogue number: 1205E I thought this bookmark would be a fun end of school year project for teachers to either have their class create or even perhaps teachers might like to give them out as summer reading incentives. These magnetic bookmarks really hold the pages in place to mark your spot and don't fall out easily.


I stamped on shiney metalic blue cardstock with Versamark and heat embossed the image using white ultra fine embossing powder. Next I cut the image out with a small circle die and matted it on a larger gold circle cardstock. Next I used the pointy circle nestibilities circle die (wow...say that three times fast!) to create the points.

Now that I have the top circle (it is merely three circles adhered together) I attached a small magnet to the back. Then I cut a strip of metalic blue cardstock 8 1/2" by 1 1/2" wide and scored it in the center and folded it. This is the body of the bookmark that will slip between the pages of your book. I stamped the front with "Enjoy!" (Serendipity stamp 1206B) and embossed with white ultra fine embossing powder.

Now the bookmark is ready to assemble and insert in your book. Attach the circles to the top of the front of your bookmark. Turn your bookmark over and on the back attach the second part of the magnet. It isn't hard to perfectly line up the magnets because they are quite powerful magnets, despite their small size. Attach it to the back of the bookmark and VOILA! Your bookmark is ready to use!


BOOKMARK RECIPE:

Stamps: Serendipity Stamps of Approval #1205E and ENJOY! #1206E
Cardstock: Royal blue metalic cardstock and gold cardstock
Ink: Versamark and White detail embossing powder
Accessories: 3 graduated sizes of Nestibilities circle dies, white detail embossing powder and small circle magnets

For more bookmarks using Serendipity Stamps, be sure to check out the rest of the Serendipity Design Team members work:

Amy Cokley
Anya Schrier
Kathie Bailey
Lynda Benden

Cheers!

Jennifer

Monday, April 19, 2010

Oh Poo!!! My sewing has gone to the dogs!

The past several weeks, in preparation for the arrival of my new Newfoundland puppy, NOAH, I have been sewing for him. This has been such fun for me to allow my sewing projects just go to the dogs! Tee hee hee!

Noah will eventually need an extra large size collar but even Newfoundlands start out as wee babies. Rather than invest in small collars as he grows I decided to make them for him as he grows.


This is Noah's first collar. I did have a bowtie attached to it but my husband is not happy about adorning our dogs with "frou-frou"! So, here is the collar, sans bow tie.

Collars are the easiest and fastest things to create. All you need is the hardware which includes the clasp, size adjuster slide and tag piece. I liked this blue dog bone fabric for a newborne pup.

I had hoped to get some adorable photos of Noah modeling his new collar. Noah has informed me that he has no desire to be a collar model and would not hold still for photos.

Try as I might to get my sweet little bear to pose, he just wouldn't cooperate.

Finally, Noah said, "I'm outta here!" and waddled off to see what the other dogs were doing.
OK...the above photo is just because he IS so stinkin' C+U+T+E!! You can't see the collar but it is under all of that soft puppy fluff!

Now let's get to the "bottom" of things. When you take your dogs for a walk, you want to be a good citizen and responsible pet owner. Yes, that's right. You MUST pick up the dog's ... ahem..."droppings", "deposits", "biscuits" .... ok, let's be blunt! You MUST pick up the dog's POO! But how many times have you been out on a walk and have forgotten to take along bags for the collection process?

I designed this simple to use "Poo bag holder" to attach to the leash and make carrying bags with you easy to get to and a supply available at every pit stop!

This little dispenser bag clips to the leash handle or to your belt loop or buttonhole...whatever is most convenient for you. I find it easiest to keep it clipped to the leash handle and then it is always ready to go when you are ready for you walks.

The bag is about 6 inches long in total so it isn't real big or cumbersome but it will hold about 6 or 7 plastic grocery sacks. Just pull one at a time from the bottom and you're ready to clean up after your pooch.

I have some more projects for the pooches that I've been working on. Perhaps if there is interest after displaying my wares, I may set up an etsy shop if anyone is interested in purchasing haute couture dog accessories.

What do you think?

Time to walk my dogs. See you soon!

Sunday, April 18, 2010

Introducing NOAH

No cards. No sewing. No cooking for today. Today I want to introduce to you my Newfoundland puppy NOAH.


Noah is 8 weeks old and is the sweetest, most cuddly little bear.
He looks so serious in these photos but he is the mushy-est, most huggleable Newf pup ever!

I just had to introduce Noah to my dear blog friends. You'll be seeing a lot more of him, as well as his big brother Gabriel and big sister Paige who are also Newfoundland dogs. I've been sewing a lot lately and I have some dog related items that have been a lot of fun to make for my pups so I'll share those with you later.

Now come on...isn't Noah just about the most precious puppy ever? I think so.

Cheers!

Jennifer

Wednesday, April 7, 2010

Serendipity Stamps Mother's Day challenge

Today is another Serendipity Stamps Challenge and this week's challenge is to make a Mother's Day card using the sketch layout below.
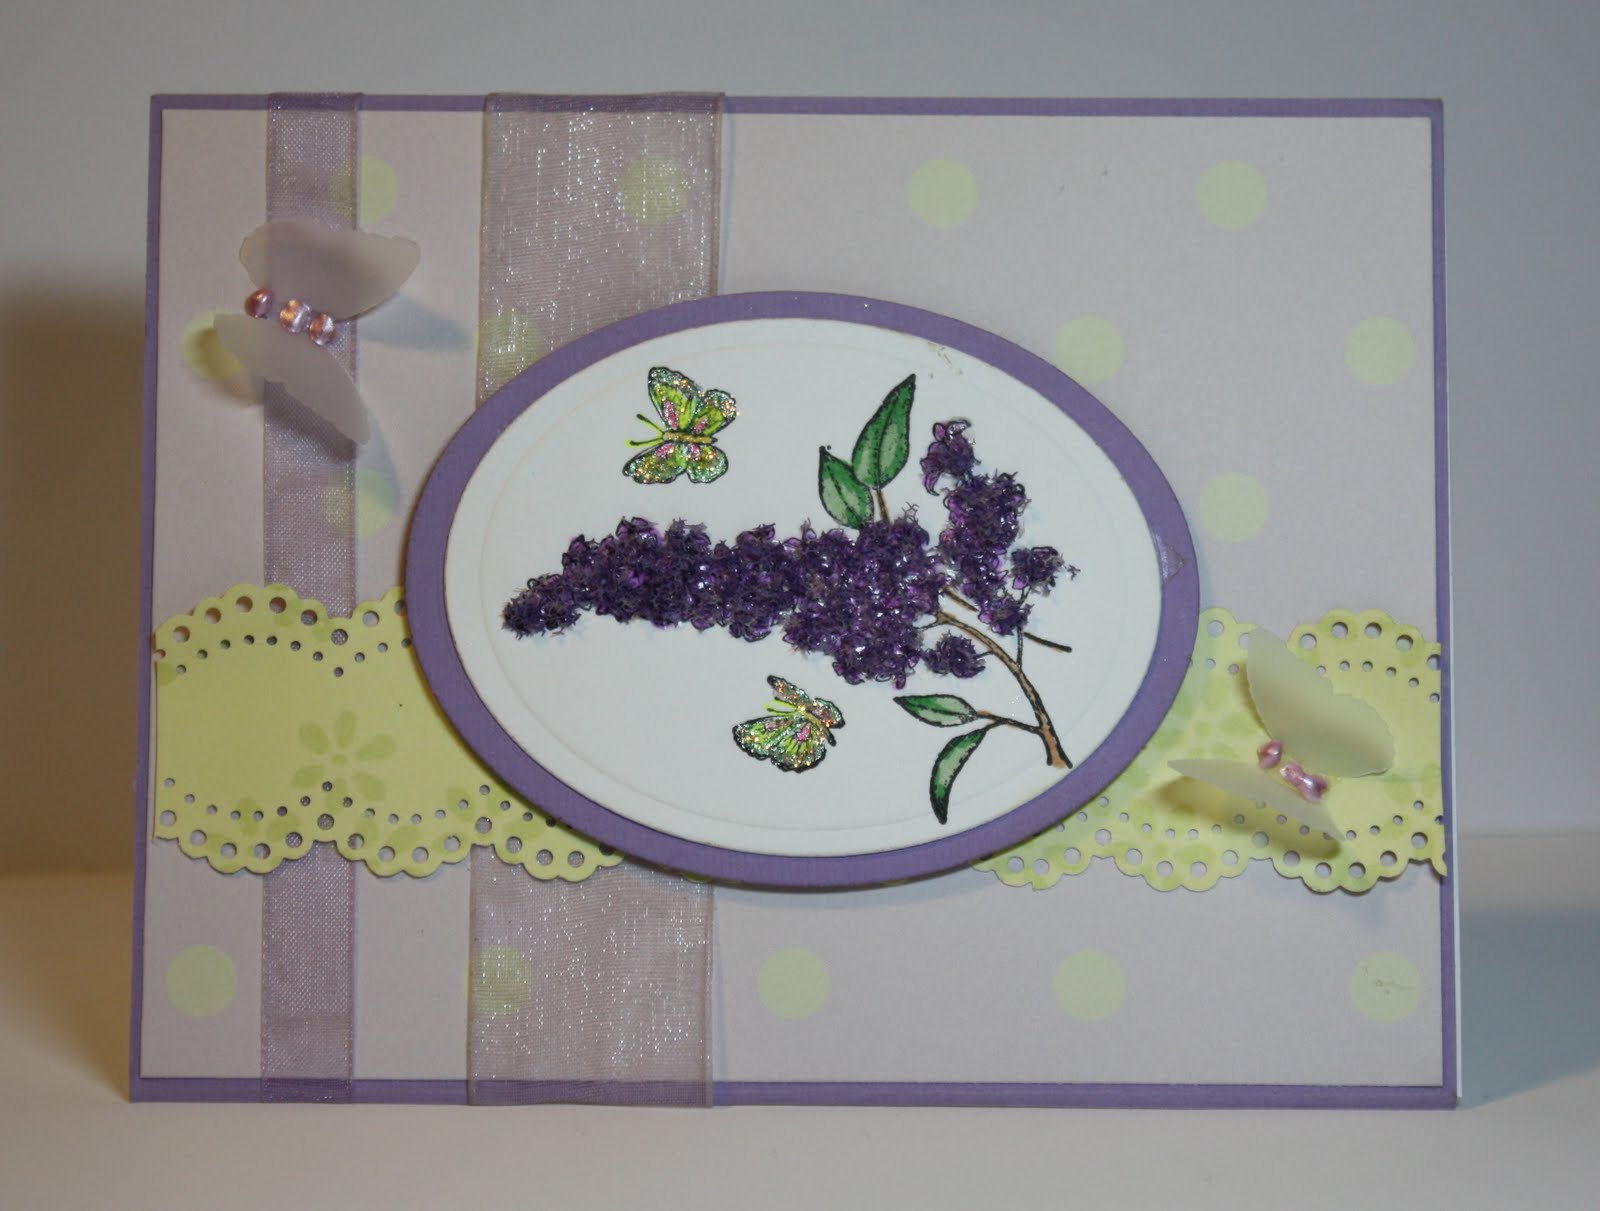
Mother's Day always falls at the time my lilacs are blooming so I thought this Serendipity Stamps set, titled Butterfly Bush, was just right for creating a card for mom.


Card Recipe:
Stamps: Serendipity Stamps Butterfly Bush
Ink: Momento Tuxedo Black. Image colored with Copic Markers and gel pens
Paper: K&Company
Accessories: Nestibilities oval dies, Martha Stewart Butterfly punch and lace scalloped border, Flower Soft product, Sheer ribbons, stickles.

For more Mother's day cards using Serendipity Stamps and this week's layout challenge, be sure to check out the rest of the Serendipity Design Team members work:

Amy Cokley
Anya Schrier
Kathie Bailey
Lynda Benden

Cheers!

Jennifer


Mother's Day

These sweet dresses hanging on the clothesline is such a nastolgic image and I think it makes a sweet Mother's Day card. This stamp set is from Serendipity Stamps and this cling set is simply titled Three Dresses.

I stamped the dresses twice and cut out the second set and popped them up on foam tape to add dimension and the appearance of hanging on the line.

While this card doesn't actually wish a "Happy Mother's Day" in the sentiment, I think this sweet quote by Samuel Butler (which is also one of the stamps included in this Serendipity Stamps cling set) is perfect for remembering mom and thanking her for all she did. The sentiment reads, "How dear to this heart are the scenes from my childhood." Above is the inside of my Mother's Day card.

Card Recipe:
Stamps: Serendipity Stamps 017QCL Three Dresses
Ink: Momento Tuxedo Black. Image colored with Copic Markers
Paper: K&Company
Accessories: Martha Stewart eyelet lace border punch, foam tape, machine stitching and eyelet and lace and ribbons.

Cheers!

Jennifer