Monday, October 11, 2010

Happy Thanksgiving!

Today is Thanksgiving Day in Canada. My husband and I are spending a lovely day together enjoying the absolutely, positively, perfectly wonderful autumn weather while doing the things we enjoy most. That is being outdoors with our dogs, my horse and Paul even took a motorcycle ride.

Early this morning we set off for the forest to give Noah, Gabriel and Paige, our Newfoundland dogs, a fun romp off leash.
Noah is my 7 month old Newfoundland puppy. He's black and stands behind Gabriel, my 3 1/2 year old Landseer Newfoundland. Noah still has a lot of growing to do and we feel certain he'll be a lot bigger than his brother and sister since he's still a puppy.
Above is Paige, my sweet Landseer girl.
Noah and Gabriel (above) set off to enjoy the scents of the fields and forest.
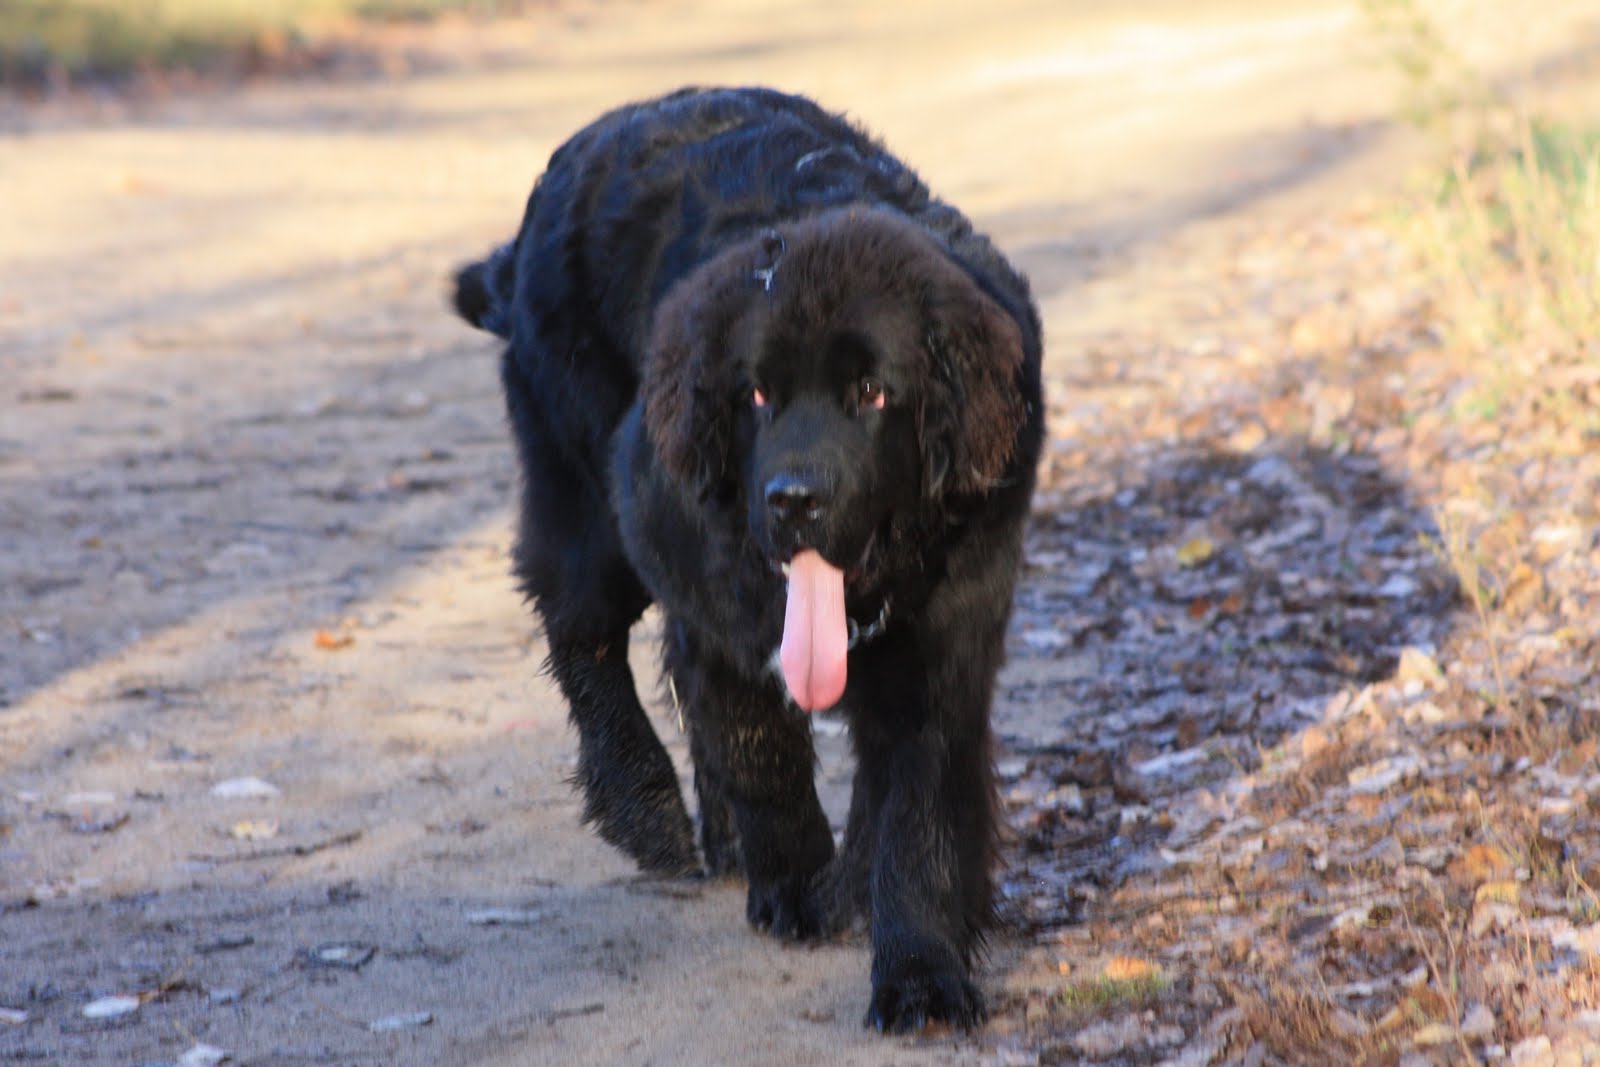
Noah has the longest tongue of any Newf I've ever owned. Of course he'd been exercising and was tired when I took the photo but that tongue of his is always hanging out one side or the other of his mouth.

After we returned home from our walk with the dogs, I fixed us a nice breakfast and then began preparing the turkey to be stuffed and put in the oven. Once I had all of the cooking preparation finished and cleaned up the kitchen, I went out to the barn to visit my sweet Gypsy mare.
As soon as Gypsy saw me walking through the field toward her she stopped grazing and came right to me.
Gypsy is the sweetest, most wonderful mare I could ever dream of. She is such a sweetheart and I love her to bits.

This is just a photo of the milkweed pods bursting and blowing the 'fairies' through the air. They were so pretty.

Well, it is now almost dinner time for a Thanksgiving dinner. The aroma of the turkey roasting smells WONDERFUL! The potatoes are cooking and I am trying out The Pioneer Woman's, cornbread and apple and herb stuffing. It looks delicious and I think if it tastes as good as it looks and smells it will become our new traditional stuffing (dressing). I also made a Pumpkin Cheesecake for dessert in lieu of the traditional pumpkin pie.

Ooohhhh I'm hungry so I'm going to post this and set the table and enjoy the rest of this good Thanksgiving day with my husband.

Happy Thanksgiving!

Jennifer

Sunday, October 10, 2010

Needle Felted Pumpkin

I'm crazy for pumpkins! I love to eat pumpkin and have been baking up quite a storm in preparation for Thanksgiving, which here in Canada, is Monday 11 October. I've made Pumpkin Cheesecake (YUMMMMMMY!!), Pumpkin Roll, Pumpkin Cookies and for dinner tonight I plan to make my famous Pumpkin Soup. Yes! I'm crazy for pumpkins.

But not only do I like to eat foods made with pumpkin I also like to make and collect pumpkin ornaments and decorations. That brings me to todays SUPER FAST 10 MINUTE NEEDLE FELTED PUMPKIN. This little cutie makes a super cute table decoration or a table place setting favor. You can make them in any size your heart desires so a variety of sizes and shapes are easily crafted in just minutes.

So simple and so cute. Here is a top view. The total time to make from start to finish is 10 minutes.
The supplies are simple as well. You'll need wool batting for the pumpkin center. Then use a variety of colors of wool roving for your pumpkin, leaf and stem. I used a slightly different color of orange for the lines of the pumpkin but you could easily use embroidery floss, I think. You will need a super sharp felting needle and a foam mat to work on. The only caution when felting is BE CAREFUL! I find felting very relaxing and have to remember not to forget that I'm punching with a very sharp needle! YIKES!
Form the wool batting into a ball or shape that you'd like your pumpkin to be. Take very thin pieces of the orange roving and begin felting with the needle. The punch, punch, punch process goes very quickly. If you see thin spots you can easily fill in with small pieces of roving. Next I added my lines to the pumpkin with a slightly different color of wool and twisted it first into very thin lines. Punch it into place spacing the lines in thirds and divide the thirds again. Now for the leaf, pinch off a small piece of green wool and shape it into a leaf shape. I felted it flat first and then attached it to my pumpkin. Finally you are ready for the stem and again, pinch off a very small piece of brown/rust colored wool and shape into a stem and felt it to the top of the pumpkin.


I'm considering making a cornucopia of various fruits and vegetables using this simple needle felted technique. Imagine apples, carrots, pears, beans (yes beans! why not?) and every imaginable fruit and vegetable.

I did not create the video (below) but it is a great example of the process to make these felted pumpkins:


Happy Thanksgiving to all Canadians on Monday (tomorrow).
Cheers!

Jennifer

Saturday, October 2, 2010

Two new book reviews

Recently I purchased an e-Reader. Specifically, the Kobo. I am thoroughly enjoying it and decided that perhaps once a month I'd review books I've read recently. I love learning what others enjoy reading as well, so I hope that if you are an avid reader of any genre of literature you'll share your thoughts as well as books you've read and recommend.


The first book I want to share is ROOM, by Emma Donoghue.

Goodreads synopsis: To five-year-old Jack, Room is the entire world. It is where he was born and grew up; it's where he lives with his Ma as they learn and read and eat and sleep and play. At night, his Ma shuts him safely in the wardrobe, where he is meant to be asleep when Old Nick visits.

Room is home to Jack, but to Ma, it is the prison where Old Nick has held her captive for seven years. Through determination, ingenuity, and fierce motherly love, Ma has created a life for Jack. But she knows it's not enough...not for her or for him. She devises a bold escape plan, one that relies on her young son's bravery and a lot of luck. What she does not realize is just how unprepared she is for the plan to actually work.

Told entirely in the language of the energetic, pragmatic five-year-old Jack, ROOM is a celebration of resilience and the limitless bond between parent and child, a brilliantly executed novel about what it means to journey from one world to another.


My thoughts: ROOM is an 11' X 11' world to 5 year old Jack. The story is told through Jack's eyes and his vision of what the world is knowing no other world than this ROOM in which he and his Ma are confined. Jack takes the reader into the world within ROOM and then his discovery of the world outside the door.

I really had my doubts that this story would be as moving, insightful and troubling as it was. I'm so glad I decided to read it despite some previous doubts. How could a 5 year old's narrative hold the reader's interest? Well, most definitely held mine.

I highly recommend this book! Here is a video book-trailer of ROOM:


The second book I'm eager to share is A DOG'S PURPOSE by w. Bruce Cameron.
Goodreads synopsis: This is the remarkable story of one endearing dog’s search for his purpose over the course of several lives. More than just another charming dog story, A Dog’s Purpose touches on the universal quest for an answer to life’s most basic question: Why are we here? Surprised to find himself reborn as a rambunctious golden-haired puppy after a tragically short life as a stray mutt, Bailey’s search for his new life’s meaning leads him into the loving arms of 8-year-old Ethan. During their countless adventures Bailey joyously discovers how to be a good dog. But this life as a beloved family pet is not the end of Bailey’s journey. Reborn as a puppy yet again, Bailey wonders—will he ever find his purpose? Heartwarming, insightful, and often laugh-out-loud funny, A Dog’s Purpose is not only the story of a dog’s many lives, but also a dog’s-eye commentary on human relationships and the unbreakable bonds between man and man’s best friend. This beautifully crafted novel teaches us that love never dies, that our true friends are always with us, and that every creature on Earth is born with a purpose.

My thoughts: If you love or have ever loved a dog, this book is a must read for you. I'm not a fast reader but I did read this in one day. I couldn't put it down. Why? Because it is unlike any other dog story you'll read. It touched my heart. Told from the dog's perspective and taking you through the "what if" a dog lives many lives the reader follows this dog's journey to discover what his/her purpose is. Heartwarming, funny and emotionally charged as well, I highly recommend this book to people who love dogs. I know I'll read this many times, I loved it that much!

A video Book-trailer of A Dog's Purpose, by W. Bruce Cameron

Wednesday, September 8, 2010

A little something for a little someone

There is something absolutely precious about Sarah Kay stamp images. I wanted to make a card for 'a little someone' to go with 'a little something' we are giving to her and so I immediately reached for this little girl at the easel stamp. The sentiment on the tag, from Stampin' Up! worked out perfectly too for our gift.

The background paper is from K & Company. I used my watercolor wonder crayons, from Stampin' Up! to color the image. I'm not sure my technique is all that great with the watercolor crayons, but I do enjoy using them. I'll have get used to using them more often now that I've rediscovered them.

It's almost time to leave for the party and take our card so I had better get ready to go. It has been fun reaching for some of my older stamps lately to make some new cards.

Until next time.
Cheers!

Jennifer

Tuesday, September 7, 2010

A pumpkin for this week's Mojo Monday challenge

It is time to get the autumn themed and Halloween stamps out. What better way to get my 'mojo' going than to use this week's Mojo Monday sketch challenge. Below is the super cute layout Julee has challenged us with.
I decided for the tag element I'd use my Martha Stewart pumpkin punch as the tag. First I used my Cuttlebug swirls embossing folder on orange cardstock and then punched the pumpkin tag and stamped the sentiment.

For the main image I used one of my oldies but goodies pumpkin stamp made by Hero Arts. I've had it for years and years and never tire of it. While straightening out my supply and embellishment closet I rediscovered my Stampin' Up! watercolor wonders crayons so I water colored the pumpkin and leaves with the water color crayons for a change. That was fun using a medium I hadn't used for so long.

The designer paper is some of my favorite from K& Company. It is double sided so it makes coordinating patterns a breeze.

There you have it. My Mojo Monday week 155 sketch challenge card.

Cheers!

Jennifer

Monday, September 6, 2010

FINtastic Day

I'm new to digital images but one company that I just love is WHIMSIE DOODLES designs. Melyssa designs the most wonderful digi images. I'm not connected with them in any way, but I just love her images.

These Koi and the sentiment are Whimsie Doodles digi images that I colored with copic markers and added some gold leaf pen to the edges of the die cuts. Pretty simple card but a fun fish image.

Woo hoo...I'm on a card making roll again. It has rained all day so it has been the perfect opportunity to stay indoors and create. More to show later.

Cheers!

Jennifer

Sunday, September 5, 2010

Penny Black: Purple, Cream and Brown Challenge

Oh my! Have I ever missed stamping and cardmaking. This summer has been filled with gardening, the animals and sewing and I've barely made a single card. Now that the garden is closing down I can finally stamp again.

So this morning I sat staring at my stamps, inkpads and embellishments trying to remember how to make a card. Hee hee hee. I really did struggle but finally decided to check out the PENNY BLACK SATURDAY CHALLENGE for this week. This weeks challenge is a color challenge to create a card using BROWN, CREAM and PURPLE and, of course, any Penny Black stamp of your choosing.

I love this color combination and reached for this Penny Black stamp titled "Friendly Surprise." I colored it with copic markers and used some pretty Stampin' Up! designer paper for the background, some lace and ribbon, and of course some flowers and stickles glitter glue. The sentiment stamp is from Stampin' Up!

Oh it feels good to make cards again. I'm sure in addition to a lot of sewing projects I'm working on, I'll be posting a lot of new stamped cards.

Thanks for stopping by.

Cheers!

Jennifer

Monday, August 30, 2010

Cool as a cucumber


When the Groundhog, HOUDINI, ate my beans and peas early in the summer, he was also particularly fond of my cucumbers. I kept replanting my cucumbers and each time he'd get through the fences and eat my cucumber plants down to the ground. FINALLY, Houdini moved on to other's gardens (I suspect so anyway) and what my husband and I called the little cucumbers that could began to grow again. I was just sure that it was to late to get a yield from the plants but was quite happy to watch them grow and blossom and produce tiny cukes just the same.


MUCH to my surprise, last weekend I discovered under their great big leaves, TEN big cucumbers. Not only that, my sweet green pepper plants decided that they'd just grow like crazy and produce far more peppers than I've ever had.

Originally when I planted the cucumbers and green peppers I knew that we'd eat most of them fresh from the garden and share with friends. We've had some very yummy stuffed green peppers this summer. Even my "I don't like stuffed peppers" husband loved them so much that he'd take left overs in his lunch to work.

But I had also hoped that I would have enough peppers and cucumbers for preserving to use as relishes and such, so early on I searched for recipes to put use should I have a good crop. So last weekend when discovered a lot of peppers and cucumbers to be used now I got out my canning supplies again and made Sweet Cucumber Relish.
My friends, I don't know if relishes make your skirt fly up (to Ree Drummond, The Pioneer Woman, that expression always makes me giggle)...anyway, if relishes don't make your skirt fly up, then haven't tasted MY sweet cucumber relish. It makes the plain hotdog, sausage, burger or tuna salad go from ordinary to EXTRAORDINARY!
I just have to share this recipe with you. It is truly delicious! I'm not kidding at all!

CUCUMBER RELISH

Ingredients:
10 cups finely chopped unpeeled pickling cucumbers
4 cups finely chopped red bell pepper
3 cups finely chopped green bell pepper
1 cup finely chopped celery
1 cup finely chopped peeled onion
1/2 cup pickling salt
3 1/2 cups white vinegar
2 1/3 cups granulated sugar
4 tablespoons mustard seeds
2 tablespoons celery seed

Preparation:
Put chopped vegetables in a large stainless steel or enamel-lined pot. Stir in the salt, cover and let stand at room temperature for 4 hours.

Put the vegetables in a large colander and drain. Rinse with cold water. Using your hands, squeeze out excess liquids.

Rinse out the pot you used for the vegtables. In the pot, combine the vinegar, sugar, mustard seeds and celery seeds. Bring to a boil over medium-high heat. Add the drained vegetables and stir to blend. Bring back to a full boil; reduce heat to medium-low and simmer for 10 minutes.

Fill prepared canning jars, leaving a 1/2-inch headspace. Fit lids on jars and screw bands down to fingertip tightness. Process in a boiling water bath canner with water at least 1 inch above the jars for 10 minutes. Turn off heat, remove the canner cover and wait 5 minutes before removing the jars.

Makes 12 half-pint jars.

I really hope you'll give this recipe a try if you have an abundance of cucumbers and sweet green peppers. You won't regret it.

I've also been putting up a lot of jars of different varieties of jams.

This summer I've made double batches of raspberry jam, and also strawberry as well as PEACH JAM. I used Anna Wright's Peach Jam recipe which she shared HERE on her SWEET & SASSY NOTES blog. It is WONDERFUL!! Not only is it wonderful on an English muffin (I just said Peach jam on an English Muffin because that is what I'm having right now as I post this post) but imagine peach on top of hot oatmeal, cool and creamy yogurt...or just about anything. I think my raspberry jam is among the best jams but Anna's Peach jam is just amazing!

Beans, beans and more beans!

"Beans! Beans! Enough to fill your jeans!" ARGH! If my husband sings that song, ONE MORE TIME!!! YIKES! But it is true, despite the beginning saga of the groundhog Houdini invading my garden, once he decided to move on to other gardens, my garden took off and even though he'd destroyed a large portion of my beans and peas, I ended up having plenty!
I always freeze fresh peas and beans and have several gallons frozen in the deep freezer of both peas and beans in the basement. However, I like to can a few jars of the beans too to have on hand to add to stews and such.
But one of my favorite added treats to put up for the winter is called DILLY BEANS. I discovered this recipe a couple of years ago on Debbie Olson's blog THINKING INKING.

Now my photo does not look nearly as inviting or as wonderful as these dilled bean pickles actually taste so I encourage you to click on Debbie's name and it will link you to her beautifully photographed post about Dilly beans as well as link you to the recipe. Let me just say that if you are a fan of dill pickles you will be amazed and VERY pleasantly surprised how good Dilled Pickled Beans are! They are crisp and snap like a dill pickles and have the pickling agents in the brin (to include garlic which I love) and...well...if you are wondering what else to do with your garden beans, give these a try. The beauty of this recipe is that you make them by jar. So if you are a bit timid, try putting up just a jar or two. Next year, I will guarantee you'll put up more! They are wonderful served on a relish or vegetable tray at parties and at Thanksgiving and Christmas, New Years or any party or celebration.

So there are my bean freezing, canning and pickling adventures this month.

Returning from the garden

What? It is the end of August? ALREADY? Where have I been? That is easy to answer. This month I've spent nearly the entire month either tending my vegetable garden or in the kitchen canning vegetable, relishes and jams. My larder is full of the bounty from my little garden. I will most definitely get back to blogging about stamping and cardmaking as well as sewing, but this month I've spent in the garden.

I should state clearly that I do not have many years under my belt as a gardener. Actually, this is only my 7th year tending a vegetable garden. It has grown from a 6' by 6' square spot in the back corner of the yard to now 8' X 30' plot. It is definitely not a large garden by anyone's standards but it is large enough for me to have plenty of vegetables and to grow a nice variety.

I will start out with my tomatoes since I had a bountiful year of tomatoes. I had Grape Tomatoes which I were more plentiful than I could handle. For the good big slicing tomatoes to eat on burgers, BLTs, and out of hand like an apple (does anyone else like to eat tomatoes that way?) I had Big Boy tomatoes.
This is just a basketful I picked one day at the beginning of their rippening and knew that I was in need of starting the canning process since there was going to be a lot more to come...and there were!
I always put up quart jars of plain tomatoes for the winter to use in chili, soups, stews and just to have as a side dish of warm tomatoes with basil and parmesian cheese sprinkled on top. Yum! These are a few jars just taken out of the canning pot.
I found a recipe online for a delicious tomato-sweet basil sauce that was reputed to be excellent to make when you have an over abundance of tomatoes to be used. The recipe lives up to its reputation because I've already used a jar or two in lasagna and with pasta dishes. It is a flavorful sauce that has a few secret ingredients that give it a wonderfully unique flavor, such as the addition of a bit of cinnamon, nutmeg and lemon peel.
I also put up some of my Grandma Inman's chili sauce recipe which she lovingly called "SNAP." I love the flavor of this chili sauce and my photo doesn't even begin to do this wonderful sauce justice. It has a subtle spice to it by adding ALLSPICE and a couple of her "secret" ingredients to this recipe. I always save a couple of jars of SNAP to give to my 83 year old mother, because it was her mother's recipe and I think it brings back some happy memories of my Grandma's wonderful cooking. One of my favorite ways to use this chili sauce is putting it in ground meat for sloppy joes or meat loaf recipes. DEEEEEEEEEEEEELISH!

I still may put up jars of salsa. I really prefer my salsa fresh from the garden but I know in the middle of winter I'll be hankering for some home grown salsa and since I still have a lot of tomatoes and green peppers and herbs to use I'll most likely make salsa to save for later.

So there is my tomato saga. Next, onto beans.

Cheers!

Sunday, August 1, 2010

Garden fresh

Good Sunday morning and Happy August 1st! I cannot believe it is already August. This summer is flying by too quickly. After returning from taking our Newfoundland dogs for an early morning walk in the forest before the day got too hot, we decided that since we were up and outside we'd do a little weeding and checking of the garden. Gabe and Paige (my two adult Newfies) went inside the house to nap after their walk in the woods. Noah, my puppy, stayed with me in the garden to "help" with the weeding.
In just a few minutes I picked plenty of vegetables for tonight's supper.

If you have followed my blog, you'll remember our little "friend" in the photo below. This is the groundhog, who we affectionately named HOUDINI who nearly destroyed my garden. Three times I replanted and resecured the garden fences and three times (an many times in between) Houdini came and feasted on my tender young vegetable plants.

Houdini destroyed ALL of my broccoli and califlower plants. Sigh...we will not get any this summer from my little garden. However, for as much as he loved my peas and beans I managed to have a couple of rows to survive.

My husband and I have such a hard time picking enough peas for a meal because we enjoy standing in the garden and eating them like candy fresh out of the pods. I think peas are such sweet vegetables that come in their own bright green packaging.

So I WILL be getting a few peas this summer. Probably only enough for meal to meal but (sadly) not enough to freeze for the winter.

My carrots are doing well but they will not be ready to pull for another month or so.

In previous years I've never had a great deal of luck with growing green peppers but this year I have a bumper crop of green peppers. They are just this weekend getting ready to pick. In fact we ate our first one last night and oooohhh how good!

More peppers on the vine not quite ready but soon will be.

Mr. Houdini again (above). I planted cucumbers THREE TIMES!! ALL three times Houdini ate down to the ground the cucumber plants as they tried to grow.
I gave up on the cucumbers, but by God's grace and a lot of sunshine and good weather (and Houdini finally leaving them alone) my cucumbers are growing again. I'll not have enough for pickles or even many at all since they are just now starting to blossom, but I just had to take a picture of the cucumbers that my husband and I have named "the little cucumbers that could." They are getting a lot of yellow blossoms on them and hopefully I'll at least get a few cucumbers to eat before winter sets in.

Tomatoes I have! There are hundreds of beef steak tomatoes as well as grape (cherry) tomatoes. The plants are so loaded with fruit that the cages collapsed so this morning my husband is resecuring my tomato plants for me, while trying not to break the vines.

I really do enjoy my little garden. This year was quite frustrating loosing so many vegetables to "Houdini". It appears that Houdini has left and moved on now. Praise be! Now I can enjoy my garden produce in peace.

Until next time....
Cheers!

Jennifer

Tuesday, July 27, 2010

A mare and her foal


This is another of my favorite horse stamps. It is from the Stampin' Up! set titled BAREBACK. This set was retired several years ago and I was very pleased when I had the opportunity to buy it from someone who no longer wanted it.

My husband frequently reminds me that I do not need to use every embellishment available on a single card. "Remember," he says, "less is more." I know. I know. But I wanted to try out a mixture of Flower Soft product for the grass and wild flowers. And I just had to add a bit of raffia. And I like to sew on cards and add photo corners and don't you think burnished brass brads give it a western look? Hmmmm....maybe I need embellishment intervention. Hee hee hee!

Card Recipe:
Stamps: Stampin' Up! Bareback
Paper: My Mind's Eye patterned paper and Stampin' Up! Cardstock
Ink: Memento Tuxedo Black, Tim Holtz Distress inks in Vintage Photo and Peeled Paint and Whispers Archival Whisper Blue
Embellishements: Nestibilities rectangle dies, EK Success paper shaper photo corner punch, Machine stitching, MM brads, raffia, Flower Soft, and image colored with Copic Markers.

This card is actually a reprisal of a card I made a couple years ago almost identical so if you vaguely recall it, it is similar, though not identical. I think this image begs to be watercolored so next time I will do that.

Cheers!

Jennifer

Thursday, July 22, 2010

Fruit Jams: not just for P, B and J sandwiches anymore

Have you been harvesting from your garden or shopping your local farmer's market for fresh fruits and vegetables? As soon as my favorite fruit farm opened with this summer's bounty I headed straight over to stock up on my supply of fresh fruits and vegetables to makes jams and pies as well as to freeze for the winter as much as we weren't able to consume now.
One of the first things I made was my very favorite recipe for Raspberry and Strawberry jams. Once the canning process was complete I wanted some labels for my jars so I can present some as gifts. SERENDIPITY STAMPS has a new canning jar stamps that I thought fit the bill perfectly. You can find this stamp at Serendipity stamps HERE. I stamped the image, added a few touches of color with Copic markers and Stickles glitter and then used my Nestibilities oval and scalloped oval dies to cut out and tie to the jar with some kitchen twine.
I made Raspberry and Strawberry jams.
What? You say you aren't a fan of jam? But jam is not just for peanut butter and jam sandwiches. Oh no! My yummy raspberry jam makes a perfect spread and topping on brie and crackers. Brie and raspberry spread: a delicious treat for a hot summer afternoon treat. My strawberry jam is also excellent on brei or any soft cheese but I do admit that raspberry is my favorite.
I will also admit that I do love to have a good old fashioned peanut butter and strawberry jam sandwich. Yummmmm.

So with my bounty of fruits from the local fruit market I headed home ...
... and brought up the canning jars and lids from the basement. Next, I washed them thoroughly and sterilized the jars.
Does the big, black enamel canning pot intimidate you and make you equate it with W+O+R+K ?
Don't let it. It is really fun to can and quite easy too. It isn't something only your mother and grandmother did. Give it a try and you'll be happy you did.
So after you've prepared your jars by cleaning and sterilizing them it is time to cook the fruit. If our computers allowed you to smell the aromas from the photos you'd be smelling the most wonderful raspberry scent filling your senses. Oh it is heavenly! Truly!
My recipe for jams is an old fashioned jam that does not require you to use pectin. Though adding pectin does aid in the process of jams to "gel" it is not required for a jam to gell up. In fact, if you add pectin you probably need to add more sugar to your recipe which diminishes the intense fruit flavor a bit. So after boiling the raspberries and sugar you are soon ready to fill the jars and place them in the hot water bath method of canning. Just be sure you do NOT boil the sugar and fruit any longer than 6 minutes. If you do, once your jam is finished it will be more like gummy fruit candy rather than jam. Another indication that you do not need to add pectins.
In a few short minutes the jars are processed and you remove them, allow them to seal and cool off undisturbed for 24 hours. Then you are ready to label and store and enjoy the fruit in the year to come.
The recipe makes six or seven 1/2 pint jars. I made both Raspberry and Strawberry jams.

Would you like to give it a try? Here is the recipe I use for what I consider to be the best homemade fruit spread:

Raspberry Jam

4 cups (1 liter) granulated sugar
4 cups (1 liter) raspberries


1. Place sugar in an ovenproof shallow pan and warm in a 250°F (120°C) oven for 15 minutes. (Warm sugar dissolves better.)
2. Place berries in a large stainless steel or enamel saucepan. Bring to a full boil over high heat, mashing berries with a potato masher as they heat. Boil hard for 1 minute, stirring constantly.
3. Add warm sugar, return to a boil, and boil until mixture will form a gel, about 5 minutes.
4. Ladle into sterilized jars and process for 10 minutes.

NOTE: I think the tip in the first step, i.e. to warm the sugar first, really is very helpful in the process for the sugar to dissolve better.

I'm going to enjoy the plate of brie and raspberry jam now. It has been waiting for me to finish typing this post and it is calling my name!

Cheers!

Jennifer